Showing posts with label inks. Show all posts

Saturday, September 23, 2017

Using fishing line on scrapbook page with Trish

Hi Crafters

Trish with you today to share a little tip with fishing line.

I find that as much as l love thread..it sometimes doesn't quite give me the look l am after....but fishing line does.
I always use sticky dots for this job, they work brilliantly.

I have started with a bit of inking..some plasterers tape...this stuff is awesome..
And the all important fishing line and sticky dots.


Some sticky dots are really good for rolling into thin rolls.
Some are great for snipping into smaller pieces.
I have adhered the line on top of the plasterers tape..remembering to ensure there is  enough line to be visible under the embellishments. 


I've added some gold metallic thread, the button and other bits and pieces.
Including my fussy cut flower photo.


For this LO l have used some chippy, a hand made flower..not by me.., a calico tag, a bit of stencil work and using the same colour on the ampersand.

Thank you for popping in.
Enjoy the rest of the creations by the very talented team.

Cheers Trish.


Thursday, September 21, 2017

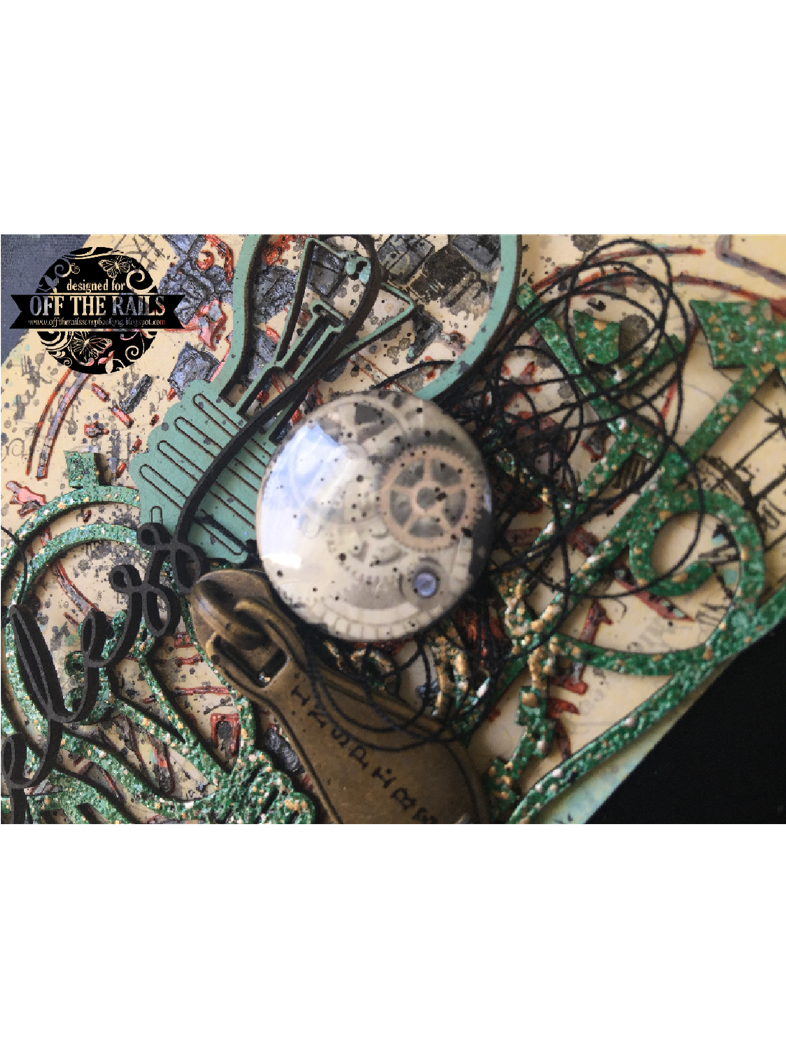
Steampunk tag tutorial + process video with Emma

Hi 
Welcome to the middle of September 😉 
Today I'm sharing a quick little video of this tag I have made. 


Still inspired by the steampunk theme I had fun making a tag for something a little different. 


I'd love you to check out my video here: 


This months moodboard to inspire you:


To create a background, I've added texture paste through a stencil, Distress Oxide Ink and stamping.


Then building layers, I've added lots of textural elements - heat embossed chipboard, metal trinkets and flair buttons.


Lastly a quote that fit's in nicely with the steampunk theme.


Can't wait to see your creations. 
Till next time, Em xx


Wednesday, September 13, 2017

Paper flower tutorial with Julie

Hi everyone.

Today I am going to share how I make one of my favourite flowers.

I saw a tutorial for this on YouTube some years ago and I just loved it and I must say I still use it to this day. I can't remember who posted the video but I am so glad I stumbled across it.

You will need the following supplies:-

The die is Tim Holtz Tattered Florals. If you do not have this die try it with different dies that cut a 6 petal flower and a spiky flower.

Also instead of the glue I quite often use my hot glue gun because it is instant.

The flower takes about half a sheet of paper.


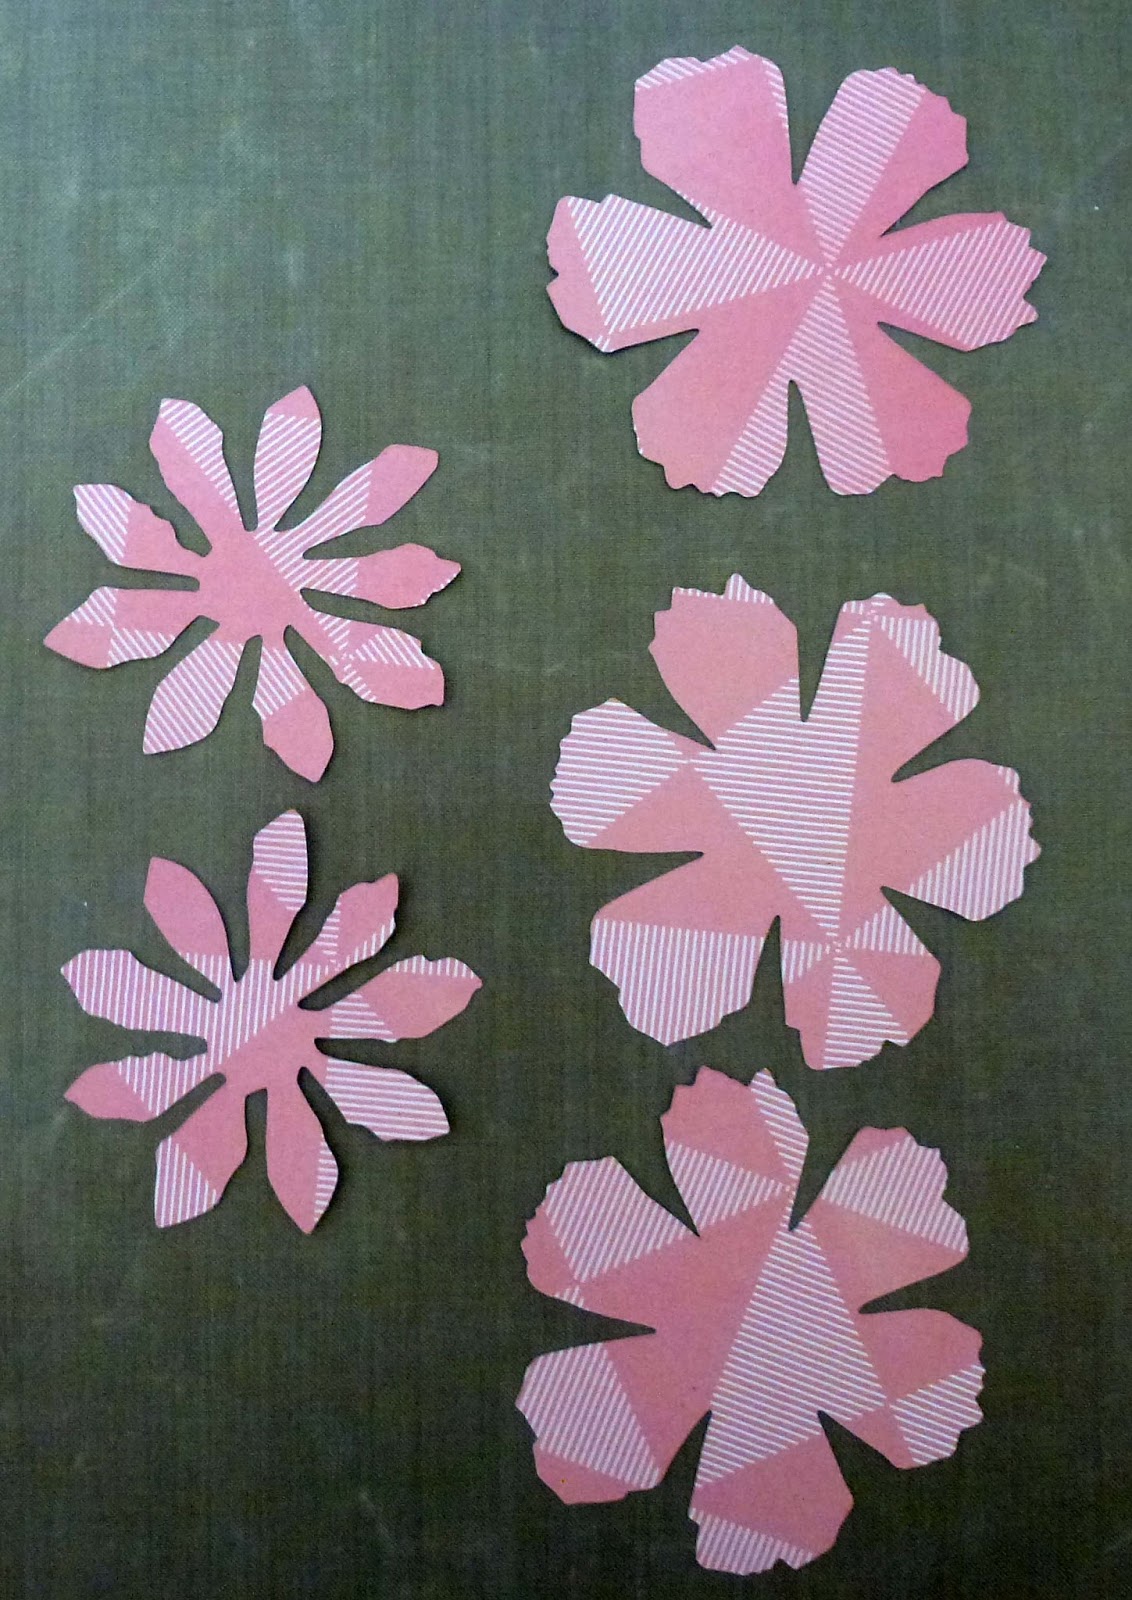
You will need to cut 3 of the large broad petaled flower and 2 of the spiky petaled flower.


With your scissors cut between the petals of the large flowers towards the centre without cutting the petals off.


Ink all of the edges of all of the petals including where you have cut into the flower. This step can be deleted if you don't like the inked look


With a small round tool, I used my hole poker but you could use a bamboo skewer or toothpick, roll the edges of all the petals on the larger flowers


Fold the petals of the spikes flowers in half so you have the right side showing


Using the same tool that you used to fold the large petals over, wrap the petals of the spiky flower around the tool. Wind in alternate directions as you move around the flower until all petals are curled


This is what you should have now. We are ready to assemble the flower.


I have used my hot glue gun. Attach one of the large flowers on top of another being sure to stagger the petals


Repeat for the third flower.


Push down in the centre of the flower as you a sticking the layers together so you get a nice depth to your flower


Attach the spiky flowers to the centre of your flower, one on top of the other.


You can then add some gems to the middle of the flower if you wish. They are not very noticeable and sometimes I do not add them.


For the flower below I used a different paper for the centre.


And for this flower I have used double sided paper and a different paper for one of the large petal layers.


I am sure there are many different combinations you could try with your papers and this flower.
Give it a go. I'd love to see what you create.

Till next time
Hugs
Julie


Monday, November 16, 2015

1 Stamp 2 Cards


Hello All, Deena on the blog with you today.

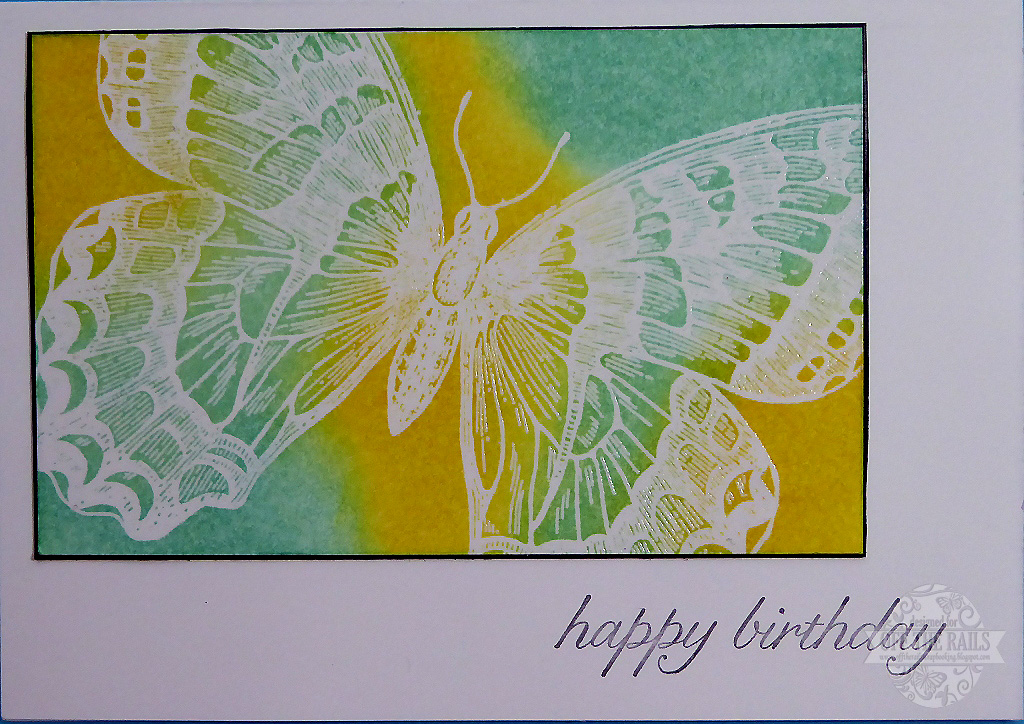
I love butterflies and I have a stamp from Stampin' Up called SwallowTail which I just love but haven't used much. So this month using the colours from our Mood Palette I have created 2 quick and easy cards with this stamp.

Below is our mood palette and I would love to see how you would use it.


All the Products I used are from Stampin' Up
Stamp - SwallowTail
Stamp - Butterfly Basics
Stamp Birthday Blossoms
Ink - Basic Black
Ink - Daffodil Delight
Ink - Soft Suede
Ink - Pool Party
Ink - Cucumber Crush
Cardstock - Whisper White
Cardstock - Basic Black
Re Inker - Cucumber Crush
Re Inker - Daffodil Delight
VersaMark
Clear Embossing Powder


Card Number 1
1. Cut cardstock to required size. Make sure that the cardstock is smaller than the image you plan on stamping.

2. Using VersaMark ink pad stamp image.

3. Embossing with clear embossing powder.

4. Using cut & dry stamp pad foam I inked my white cardstock with Pool Party and Daffodil Delight. The embossing acts as a resist. 


5. Mount image on black cardstock.

6. Attach to the left had corner of card base.

7. Stamp sentiment in lower right hand corner.


Card Number 2
1. Cut A4 cardstock in half to form the card.

2. For each colour of ink used I filled mister with a small amount of ink  then add water. 

3. Lay cardstock on a protected surface and spray.

4. Dry both sides of the cardstock.


5. Score cardstock to form the card base. Normally I would have done this after cutting the card base but I wanted the colour on the front and back.

6. Stamp Butterfly image and sentiment.

7. Flick card with the watered down ink.


Saturday, October 31, 2015

LAWN FAWN!!!!!


Once again we would like to thank Lawn Fawn for sponsoring us. Kelly is such a gorgeous lady and is more then helpful, pop over there and have a look around their site.

Here are a few of their NEW products, get your hands on them, click on their photo to take you straight to that product.

 toboggan together 

happy harvest

pumpkin spice ink pad


Thank you 
again Lawn Fawn, we look forward to you to seeing again

Thursday, January 29, 2015

Dimensional Magic Resist Tecdhnique

Hi everyone! It's Tina here.  I thought I'd share a fun technique for creating a resist effect on your projects.
Dimensional Magic Resist Technique

1. Stamp images using Stazon, chalk, or pigment inks ( so they don't bleed in the later steps)


2. Apply Dimensional Magic to various areas where you wish to create a resist effect.  I filled in the butterflies and loosely outlined some of the grasses.


3. Allow to dry.


4.  Blend two or three complimentary Distress Inks using a circular motion with a foam applicator. 

5. Lightly mist or flick some water over your tag, which will create a nice distress effect.  Allow to dry


Thursday, November 6, 2014

Special Delivery

Hello OTR friends. Fiona here with you today to share my latest creation. I used this months mood palette as inspiration for my decorated pizza box. 


Yes I said pizza box! LOL Let me explain. 


So I submit a few of my layouts to magazines (the one's they'll take anyway) and they ask that you send in the original for photographing. A pizza box, just happens to be the best size for a 12x12 layout and so that is what we use to transport them around in.


A little while back Scrapbook Memories magazine put out a challenge for submitters to decorate their pizza boxes for them. Just for a bit of fun really. The tradition of decorating submission boxes is not a new one but it's been largely only done randomly and very occasionally. Once SBM put out the call for boxes to be decorated the craze went viral!


They then started returning crafters creations to them in other crafters boxes they had decorated. It is so exciting to receive one of these boxes! and even more exciting when someone receives yours!


Some of them are mailed all over Australia and added to by their new creators. It has become such an excitement that a facebook group has been set up by Heather McMahon (A current SBM Master) to help find and share owners of each fabulous creation. "The Great SBM PizzaBox Mailart Hunt".


So this is my latest one. I hope the receiver likes it.


Here is a quick little run down of how I created this effect.


With Pizza boxes, the thrill of receiving one is grand but even bigger is the thrill of adding to one. This box came from SBM and was lovingly taped up with purple spotty tape by the very talented Natalie Elphinstone other wise known as One Scrappy Doctor. As soon as I saw the purple I knew it was the right box for this challenge mood palette.


So I added!


I made up a concoction of modelling paste, paint and Spray to create a beautiful gooey purple texture paste and I lathered it over a coordinating piece of 12x12 patterned paper I had in my stash using a palette knife. I think the paper is from a Simple Stories collection. 


Then I gave it a light spray with the Dylusions while it was still damp.


To decorate it, I die cut some flowers from a die using more coordinating patterned paper to add on the top of the background. The key to decorating these boxes is to keep it flat. So adding texture can be tricky.


One way to do it is to use textured papers. In this case I used Sticky Bark paper for the small leaves that adorn the larger flowers. Sticky Bark paper is literally paper with a very thin shaving of wood attached to it. It's actual real wood and the texture is divine!


I hope that I've inspired you to try something different. Even if you never submit any pages to a magazine you may find you still need to transport them one day and what a perfect way to do it!

Why not pop over to our challenge and give this colour combo a go yourself? Follow the link here for more inspiration and to link up your creation.


Until next time


Cheers

Fiona xx

Saturday, June 21, 2014

Art Journalling with Catie

I'm sharing an art journal page that I've just completed, for inspiration this week.  This page actually started out in my mind as a spacey-night-starry type scene... but that didn't eventuate, and as I added more layers, this is what evolved.

I've used some really fun products on this, such as Faber Castell Whipped Spackle, Shimmerz texture paste, stencils, masks, mists, inks and more.

I found working on this so therapeutic, as there was no real outcome in mind... I was just creating for the sake of creating, and I think that that is one of the beauties of art journaling... you can just let yourself go and go wherever your art takes you.

I chose this quote from Sylvia Plath: "The worst enemy to creativity is self-doubt", as when I start at a blank art journal page and try to picture what I'm going to put down on it, it can actually be a bit daunting.  I've found that if I just shut off the thinking part of my brain, and let the creative part play with different techniques, and materials, and textures, I actually end up with something I rather like.

I hope you enjoy this page and the close ups of the page below :)
Thanks for looking.  Catie x