Showing posts with label steampunk. Show all posts

Tuesday, October 3, 2017

*** Winner September challenge ***

Hello Crafters

What fun you all had with our September steampunk moodboard.
It was hard to make a decision but our DT has decided the winners.

Congratulations to

Judy W


and
Jodie


It was a tough choice this month with lots of great entries.
We thank you all for playing along.

Our September sponsors provided a generous prize.


Please contact:

cchelepy@bigpond.net.au


to claim your prize.
*** Please note, prizes are provided by the sponsor so may take some time to arrive ***

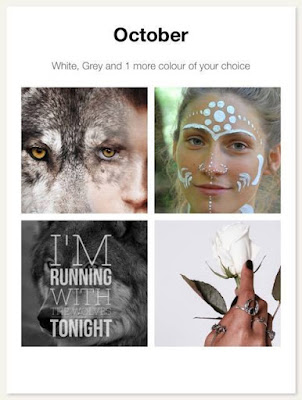
Don't forget to get your entries in for October's challenge.

October Challenge

Happy Scrapping.

Louise xo

Saturday, September 30, 2017

Thank you September Sponsors

Hi Crafters

What an amazing response to our September steampunk moodboard!

We are so pleased that you loved it and played along.

Stay tuned for the winner announcement soon.

For today I'd like to thank this months sponsor who generously donated prizes for playing along here at Off the Rails.


Thank you also to our new and continuing Design Team for providing wonderful inspiration this month.

We can't wait to share next months fabulous moodboard with you.

Happy Crafting.

Louise xo


Wednesday, September 27, 2017

Steampunk Art Journal tutorial with Luciana

Hello my friends! Today is Luciana with you!
Our mood board this month is amazing!
I'm excited because I love this theme - Steampunk!


 I decided to make pages of my art journal in this style and I want to show you! Let's go to?

1 - Apply a chipboard with 3D matte gel.

2 - Apply gesso over the pages and chipboard.

3 - I decided to add a chipboard gear.

4 - Apply a little Stone Effect Paste Pumice. I love the effect!

5 - Apply 3D powder with your fingers.
 

 6 - Now works with the colors of preferred sprays. I used Color Bloom Sprays.
 

 7 - Apply metal embellishments with silicone glue.
 

8 - Finalize by applying stamps for the project!

Here are some close up details of the project.


Material used: metal embelishments mini stars #963354, steampunk gears #963453, metal embelishments mini hardware #963316,3D powder pentart, stone effect past pumice, heavy white gesso #961442, colo bloom antique gold #573843, pressed petal #573881, vintage coal #573799, archival ink pad jet black, cling stamps prima marketing #580186, #580162, clear stamps savage district collection #584726, clin stamps never too late #961985, chipboard momento divertido.

I hope you enjoy it and participate in our monthly challenge !!
Thank you for your visit!
See you soon!
Luciana


Thursday, September 21, 2017

Steampunk tag tutorial + process video with Emma

Hi 
Welcome to the middle of September 😉 
Today I'm sharing a quick little video of this tag I have made. 


Still inspired by the steampunk theme I had fun making a tag for something a little different. 


I'd love you to check out my video here: 


This months moodboard to inspire you:


To create a background, I've added texture paste through a stencil, Distress Oxide Ink and stamping.


Then building layers, I've added lots of textural elements - heat embossed chipboard, metal trinkets and flair buttons.


Lastly a quote that fit's in nicely with the steampunk theme.


Can't wait to see your creations. 
Till next time, Em xx


Tuesday, September 19, 2017

Steampunk card with Dawid

Hi everyone,

For today's inspiration I prepared a steampunk Love card.
I used gears and media like gesso and mist.
The main colors are differents shades of brown. 


I prepared a video with creating process. I hope you like it :)


Hugs,

Dawid


Friday, September 15, 2017

September mid month reveal with DT

Welcome to the mid month DT reveal.

The team have some really great projects and you've still got plenty of time to join this months moodboard challenge.


Here are some projects to get your creativity flowing...


This month we thank our two wonderful sponsors:


Great inspo from the DT.

Hope you can play along.

Louise
xo

Saturday, September 9, 2017

Steampunk Cards with Candy

Hello hello everyone.

Today I have made three male cards.
When I saw this moodboard I thought yes steampunk.


This what I have created


I am just going to feature one card for you
with the instructions on how to make it.


This is a 6x6 inch easel base made from cream cardstock
  1. Cut a piece of the pattern paper at 5 7/8 x 5 7/8 inches then a piece of the cream cardstock at 5 1/2 x 5 1/2 inches then put this through a cog embossing folder. I very lightly went over with some brown ink to make the cogs stand out a little more. Tape both of these to the front of your card base.
  2. I have used the collectable and just placed them where I liked them. Some are raised and some are flat. I also added a flair button.
  3. Now for the bottom. Cut a piece of the cream cardstock at 3 x 5 1/2 inches and also a pattern paper at 2 3/4 x 5 1/4 inches. Tape these together and use some faom tape to raise up. I added a sticker from the sticker sheet from the same range. 

Products used
Cream carstock
Kaisercraft Barbers shoppe collection - Comb, Razor and aftershave papers
- Collectables and sticker sheet
Burlap trim
Cog embossing folder
Funky flair studio flair buttons

Thank you for visiting
Candy Chelepy
2017
Design Team


Thursday, September 7, 2017

Steampunk card - September challenge inspiration with Kajal

Hello

Today I want to share my take on the steampunk challenge this month. 


I was inspired by steampunk and made a beautiful card. 
It took one day to think and few hours to make.

Let's learn how to make this beautiful card

1) I took black cardstock and make a simple card of 6"x8"

2) Then I took another brown cardstock to paste on black cardstock . I also put double sided thick tape on brown cardstock to make it 3D effect


3) I cut 1"1/2"x8" black cardstock strip then put double sided tape on it and pasted these on one another like this 

4) Then I used wooden gear embellishments that I have coloured with distress ink 

5) and done wooden wings embellishments with embossing powder to give that golden glossy look 

6) last step to assemble all these in perfect position so it will look beautiful and hence card is completed 


Thanks 
Happy Crafting