Showing posts with label Kaisercraft. Show all posts

Thursday, June 7, 2018

Scrapbook Layout with June Challenge prompt


Good Morning Off the Rails Friends,

Deb here with a 12x12 mixed media layout incorporating the June challenge


Fabulous moodboard isnt it??

First off I took a piece of Bazzill Marshmellow cardstock and using Crackle Texture paste stencilled the whole background using a stencil that looked a bit like water, sand and clouds, lol

I then took my Prima Watercolours and used blues and yellows to create the sea, sand and sky.  Once this was dry I added splatters with Dylusions Shimmer Spray, Smooch Spritz and Dylusions Mica Spray

Once I was happy with the background, I cut out some journalling cards from an old Kaisercraft collection- Sandy Toes - and matted my photo with a piece of Kaisercraft Offshore Collection - Current (A and B side).  I then placed some the photo matt onto some craft foam for dimension.
I layered my photo and journalling cards across the middle of my layout horizontally, and embellished with some Maremis Smallart fussy cut flutterby and watercolour flowers, as well as a flair badge, and some brads from the Offshore Collection.  A journalling tag has the location and date of the photo.


All in all a very simple layout for you.

Thanks for joining us today.  I look forward to seeing what you produce with the challenge.


Saturday, September 9, 2017

Steampunk Cards with Candy

Hello hello everyone.

Today I have made three male cards.
When I saw this moodboard I thought yes steampunk.


This what I have created


I am just going to feature one card for you
with the instructions on how to make it.


This is a 6x6 inch easel base made from cream cardstock
  1. Cut a piece of the pattern paper at 5 7/8 x 5 7/8 inches then a piece of the cream cardstock at 5 1/2 x 5 1/2 inches then put this through a cog embossing folder. I very lightly went over with some brown ink to make the cogs stand out a little more. Tape both of these to the front of your card base.
  2. I have used the collectable and just placed them where I liked them. Some are raised and some are flat. I also added a flair button.
  3. Now for the bottom. Cut a piece of the cream cardstock at 3 x 5 1/2 inches and also a pattern paper at 2 3/4 x 5 1/4 inches. Tape these together and use some faom tape to raise up. I added a sticker from the sticker sheet from the same range. 

Products used
Cream carstock
Kaisercraft Barbers shoppe collection - Comb, Razor and aftershave papers
- Collectables and sticker sheet
Burlap trim
Cog embossing folder
Funky flair studio flair buttons

Thank you for visiting
Candy Chelepy
2017
Design Team


Monday, July 10, 2017

July Scrapbook layout with Candy

Welcome welcome ladies.
This month we have a great moodboard challenge.


You could create with african animals,
zoo or just do the colour challenge, which was what I decided to do.
I have used orange, red and yellow on my layout.


This took me right out of my box as orange is not a favourite colour of mine
and I struggle to use it. 
 I decided to use a very old Kaisercrqaft Collection
Curiousity.
 I cut three papers at different sizes, then taped them to the background.
I then covered the background with clear gesso
 as I wanted the splatters of yellow and my stamping to stand out. 


My photo is raised with foam tape, adding the red lace under the photo
and up along the top right side of my paper.
Using a leaf die I cut out three leaves, one of these are cut apart.
I added collectable flowers under the flowers then layered
everything else. Adding the flair button.
I covered my photo and splattered with the yellow die
 then stamped with a script stamp and red ink pad 
to finish off my page.


Products used
Kaisercraft Curiousity Collection
- unique paper
- collectables
- 6 1/2 x 6 1/2 inch paper pad
Red twine and lace
Prima and Kaisercraft flowers
Creative expression faux quilled leaves die
Funky flair studios flair button
Red ink pad and script stamp
Liquitex yellow ink
Crystalina glitzin glamour


Thank you for visiting

Candy Chelepy
2017 DT


Tuesday, May 9, 2017

Scrapbook layout by Candy

Welcome everyone Candy here with another project for May.

Wow how the months are flying by, 
it will be Christmas before we know it.
The layout I have created using the Kaisercraft Ubud Dreams Collection.
I thought this would suit the mood board perfectly.


This is a photo of my daughter Tracy fishing.
This month we encourage you to use feathers on your project and I thought
the feathers would soften, making it a bit more feminine.


Here is the moodboard


Thank you for visiting
Candy Chelepy
2017 Dt member


Friday, May 5, 2017

Scrapbook layout + process video by Louise - Feather technique for the May moodboard challenge

Hi Scrap Friends

Louise with you today.
I'm sharing a layout + process video to show you a feather technique for this months moodboard.

"Today"


The challenge this month is to create from the inspiration board and include feathers on your page.


I decided to use this collage photo and include the colour turquoise from the moodboard.
In my process video you'll find a little technique to make these arrow feathers.
With thanks to Michelle Grant who provided this technique during a class.


Thanks for watching.

Can't wait to see you play along.


Thursday, December 31, 2015

A new designer with a beautiful tutorial, welcome Lynn

I have created my first tutorial for Off The Rails Scrapbooking and it is for the layout that I did this month.  This is the layout:


I have used Kaisercraft paper from the Silver Bells collection.  


I cut up some of the other paper in this collection into strips and have glued them down using Prima Art Basics 3D Gloss gel.
I have then applied 3 Lindy Stamp Gang Sprays using a paintbrush and water.  I have not sprayed directly onto the paper.  The colours used are Delphinium Turquoise, Salt Water Taffy and Frenchys Pink Pout


Around the edges of this frame the paper pieces have created, I have stamped and embossed.  I have used Stampendous stamp - Jumbo Snow and Stampendous White Embossing powder.

This has now created the base of the layout and you can being the layers.


I embossed a plain white piece of cardstock and then cut tags from this.  The tags were edged with Tim Holtz Distress Ink- Spun Sugar


I have cut 2 die cuts - Memory Box Frostyville Wreath.  I layered them together to get a thicker fuller look.


I have used another die cut - Die-namics Mini Doily.  This I have cut in half, as you only see half the doily and it makes the die cut go further!

I have then put the layout together.  Added some words from Tim Holtz Idea-ology Chit Chat stickers which I backed with cardstock and inked around the edges.


Final touches - I have added some clear glass Micro beads with 3D Gloss gel - always like to have some bling on the layout somewhere!!!!

I hope that you have found some tip here and til next time Happy Crafting !!


Then we are going to leave you with our sponsor this month. You have to see their range


Or jump on over to there Facebook page and leave them so good feedback

Friday, December 18, 2015

Just for you - From Candy

Hello everyone.
Candy here with you all once again bringing you another layout. I have been trying to use up my stash and also my scraps. I am sure we all have plenty of both. I have each collection in a bag to keep them all together. I have made a simple layout for you all today using the lovely Kaisercraft Silver Bells collection.


I have cut 1 1/2 inch strips and placed them under my photo along with a 4 x 4 1/2 inch piece as a photo mat. I also used a strip of the pink scallop from the sticker sheet and glued them all down well. The photo is raised. I cut out 11 baubles and taped some flat and others on foam tape. 
I added a tag under the photo and cut out a white tag which I have written my journaling on.


As you can see I have added a non Christmas photo but I think it looks pretty good. I used some metal pieces from my stash and painted them with gesso then went over with some pink chalk ink.  And to give it a bit of bling added some glue here and there and used some sterling glass glitter.
The journaling reads...
A girl and her best friend, big sloppy licks and kisses


The mood board for December


Thank you for visiting

Candy Chelepy
2015 Design Team
 Off the rails Scrapbooking

Friday, November 7, 2014

A Stunning Card

Sandi today with a stunning card

A friend of mine has just had a wonderful addition to their family so I thought I'd make her a very special card.

Sandi's Hobby Secrets 

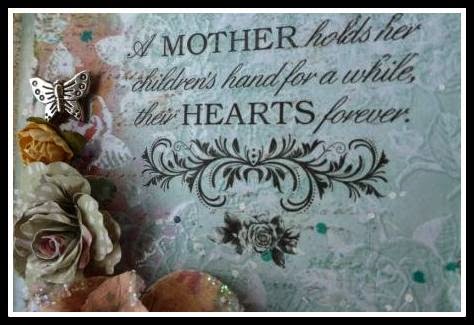
 My card stock was from Kaszazz and edged with Tim Holtz Distress Inks (Antique Linen, Stormy Sky, Iced spruce). The paper was from Kaisercraft 6x6 paper pad 'Kaleidoscope'  with its edges distressed and torn. I used Dylusions Ink spray (Bubblegum Pink, Vibrant Turquoise, White Linen) and Distress Ink stain (Spiced Marmalade) using painting, splattering and rubbing. In the top corner I placed a beautiful rubon quote from Kaisercraft (English Rose). The flowers I added were from Prima, Kaisercraft and Tappy Toppers with the butterflies brought from our local coastal shop in Beachport -Coastal Treasures.


Thanks for coming and seeing my latest card and hope you have enjoyed visiting Off The Rails Scrapbooking