Showing posts with label die cuts. Show all posts

Sunday, February 4, 2018

Getting the most out of your dies with Bev


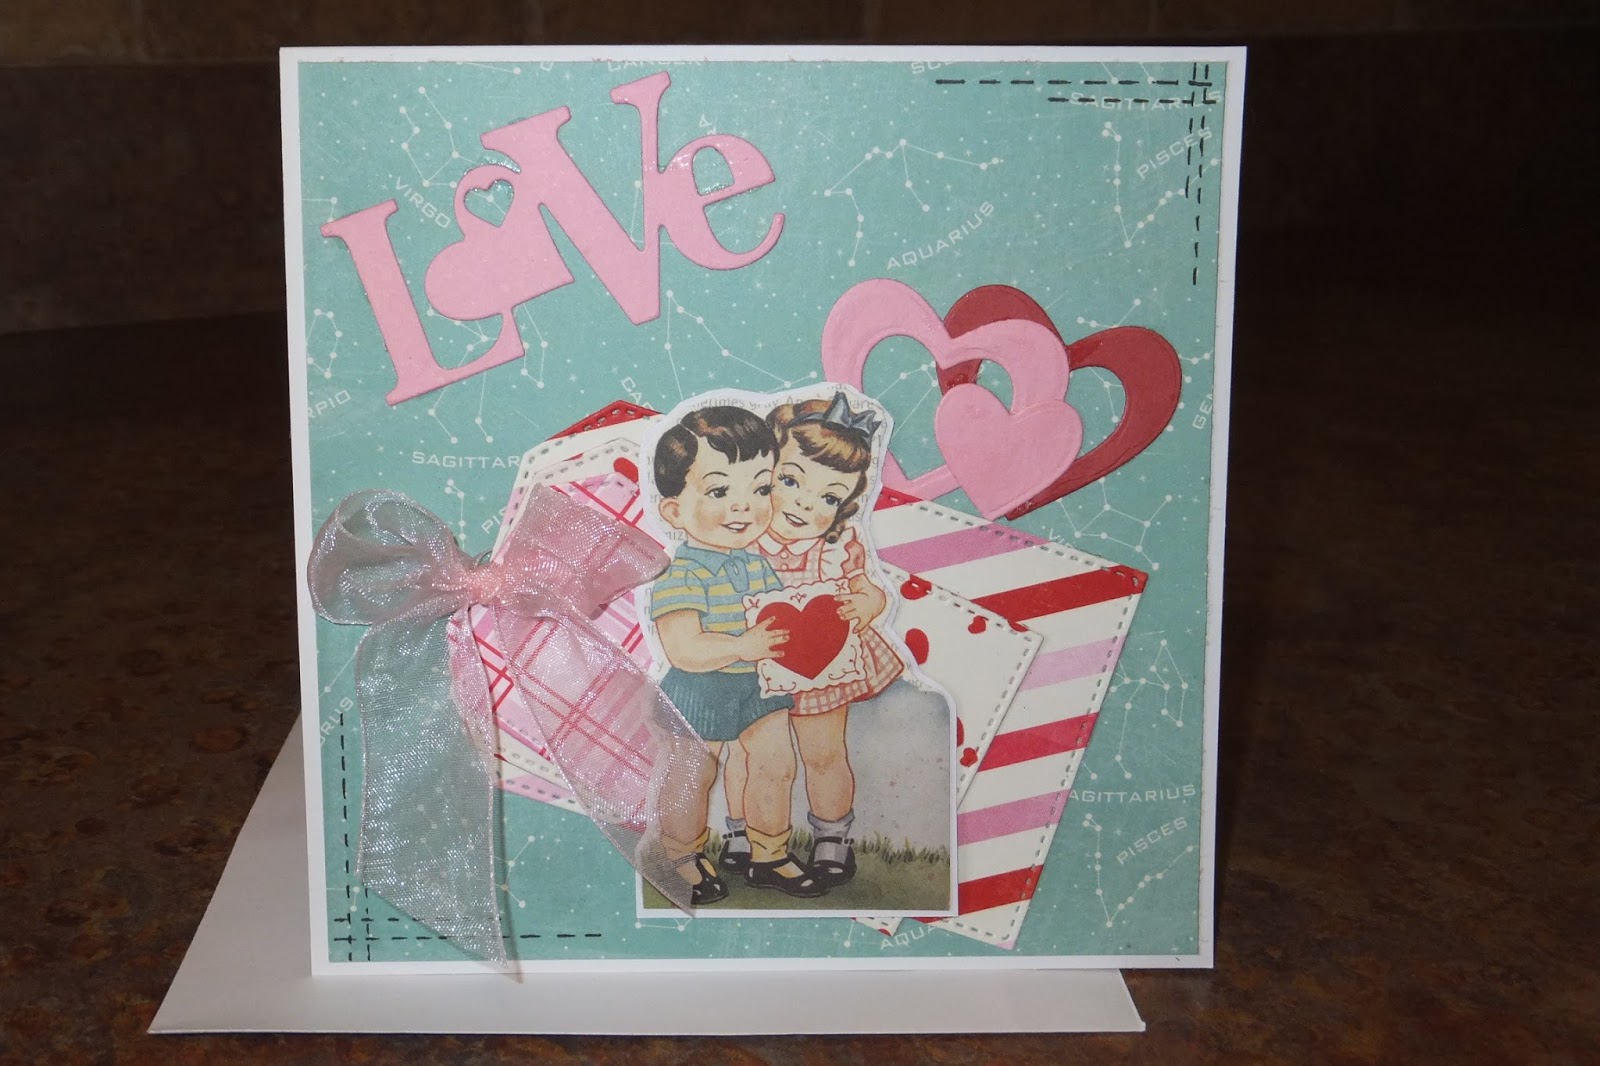
Hi everyone... it's Bev here today at Off the Rails Scrapbooking sharing my tutorial on making the most use out of your dies. I have been purchasing more dies lately and have been trying to collection some that are theme specific but also good for more uses. Example using the card above the "LOVE" sentiment with the valentine images is Valentine card Specific for this one... but would also work on an Anniversary card or a loving Happy Birthday card or even a Wedding Card. Hearts would also work on all those themes too. And the nested tag dies we often for get to use them for more than just tags. They make great background based for cards and also photos on layouts ... we just need to remember to use them.


Here are some close ups of my finished card for your viewing.


Fabulous fun cluster of layered tags using fun print papers. 


Actually this group of hearts were done leaving the dies joined together which gives you some solid and some centre hollow cuts. I quit like it and will not be pulling the pieces apart.

Thanks for joining me today... hope to see you again soon.


Sunday, September 17, 2017

Easy card making tips with Joan

Joan here today.
I'd like to share two cards I made during my latest card making frenzy.  I found that my Cricut machine and my Gelli Printing Plate are a great combination when it comes to making cards. 


1) Apply several colors of acrylic paint to the Gelli Printing Plate


2)  Roll the paint into a thin layer using a brayer


 3)  Create a design by placing a stencil on top of the paint


 4) Place a sheet of paper onto the stencil and gently rub the paper with your hands to transfer the paint


5)  Pull the paper up to reveal your print

6)  Remove the stencil and follow steps 4 through 7 to make another print


* I thought if I was going to make two prints I might as well make a stack of them for future use.


 7) Die cut a variety of fall themed images


 8)  Emboss die cuts with an embossing machine if desired


 9) Cut cardstock for your card base and matting and cut your Gelli print to fit on top of you matting

10) Assemble cards using adhesive


Here are 4 tips to making multiple cards at once:
a) keep it simple 
b) use the same formula
c) add little details
d) use the same medium 

Thanks for visiting.
Happy Crafting.
Joan


Wednesday, September 13, 2017

Paper flower tutorial with Julie

Hi everyone.

Today I am going to share how I make one of my favourite flowers.

I saw a tutorial for this on YouTube some years ago and I just loved it and I must say I still use it to this day. I can't remember who posted the video but I am so glad I stumbled across it.

You will need the following supplies:-

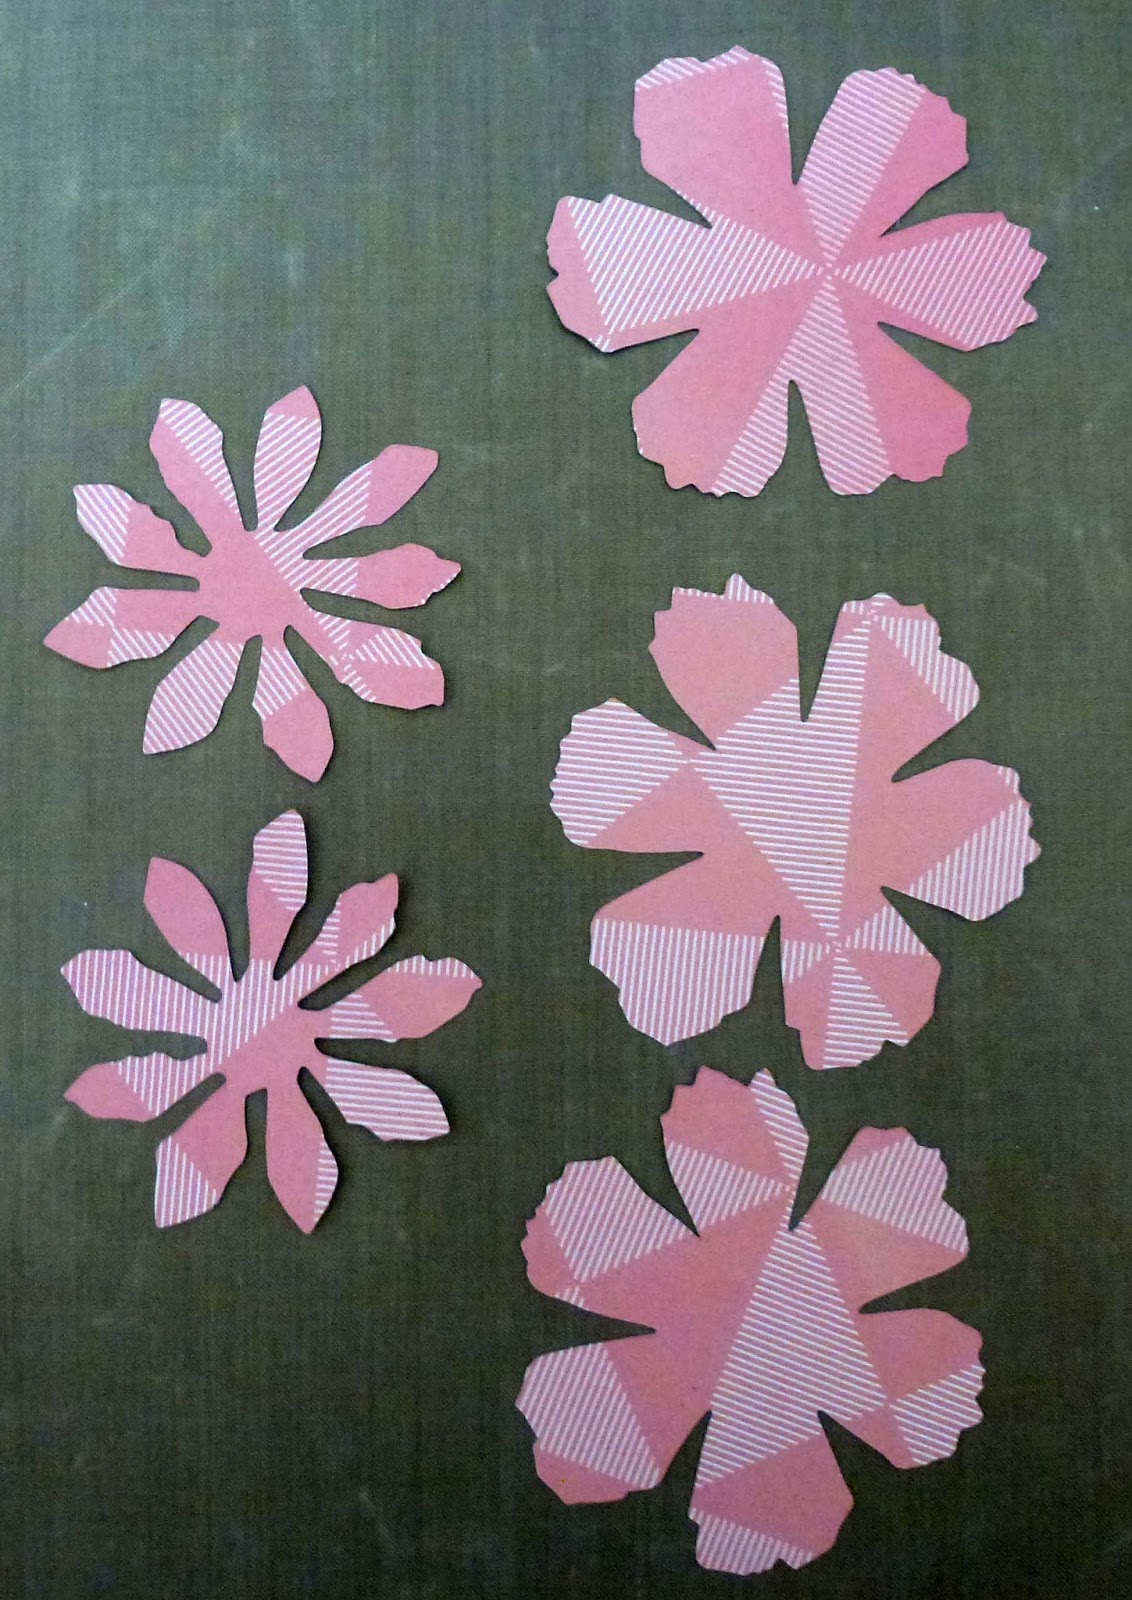
The die is Tim Holtz Tattered Florals. If you do not have this die try it with different dies that cut a 6 petal flower and a spiky flower.

Also instead of the glue I quite often use my hot glue gun because it is instant.

The flower takes about half a sheet of paper.


You will need to cut 3 of the large broad petaled flower and 2 of the spiky petaled flower.


With your scissors cut between the petals of the large flowers towards the centre without cutting the petals off.


Ink all of the edges of all of the petals including where you have cut into the flower. This step can be deleted if you don't like the inked look


With a small round tool, I used my hole poker but you could use a bamboo skewer or toothpick, roll the edges of all the petals on the larger flowers


Fold the petals of the spikes flowers in half so you have the right side showing


Using the same tool that you used to fold the large petals over, wrap the petals of the spiky flower around the tool. Wind in alternate directions as you move around the flower until all petals are curled


This is what you should have now. We are ready to assemble the flower.


I have used my hot glue gun. Attach one of the large flowers on top of another being sure to stagger the petals


Repeat for the third flower.


Push down in the centre of the flower as you a sticking the layers together so you get a nice depth to your flower


Attach the spiky flowers to the centre of your flower, one on top of the other.


You can then add some gems to the middle of the flower if you wish. They are not very noticeable and sometimes I do not add them.


For the flower below I used a different paper for the centre.


And for this flower I have used double sided paper and a different paper for one of the large petal layers.


I am sure there are many different combinations you could try with your papers and this flower.
Give it a go. I'd love to see what you create.

Till next time
Hugs
Julie


Tuesday, November 24, 2015

Creating a Background From Die Cuts

Hi Off the Rails fans!
Sadly, this will be my last post as a member of the Off the Rails Design Team. After being a member of the team since it began two years ago, it's time for me to step aside and make room for other talented designers to inspire you.

I would like to say a huge thank you to Amanda, Deena and all the other fabulous team members I have come to know over the past couple of years, it has been a joy working alongside you all.

For my final post I have a layout to share that I created using a technique that was inspired by Missy Whidden recently. (You can see Missy's original layout on her blog here)

Here is my version...


When I first saw Missy's layout using a cut file of a repeating shape in different sizes to create her background, I thought I would try replicating the technique using dies instead. (I don't have a Cameo, but I do have plenty of dies in my stash I just don't use enough.) I decided to use my Spellbinders Donna Salazar Rose Creations ones that were designed to create a layered rose, as they gave me the same shape in a variety of sizes. I used a selection of papers from Cocoa Vanilla Studio, including the sheet I chose as my base.

After cutting out the flowers, I decided where on my layout I was going to place my photo, and then arranged the pieces to suit. Once the flowers were down, I used gelatos and a water brush to add some extra colour highlights around the page.


After that, I used some layers of tissue paper to mat my photo and then I added my embellishments.
I created this cluster in the top right hand corner using a D-lish Scraps mini paper doily, Heidi Swapp ephemera pieces, Freckled Fawn paper clip and a Cocoa Vanilla Studio sticker.


Alongside my photo I added a die cut piece from Kaisercraft, some cotton thread for subtle texture and a D-lish Scraps flair button; and then a Cocoa Vanilla Studio sticker on the other side.


Below the photo I added more thread, another Kaisercraft die cut and more Cocoa Vanilla Studio stickers.


To finish my page I added a title using Jillibean Soup alphabeans; handwritten journaling and a scattering of D-lish Scraps sequins.


I hope you have enjoyed seeing this project and that I have inspired some of you with my creations over the past two years. Thanks to everyone for their support and kind words during my term.
I look forward to keeping up with the challenges and all the beautiful work from the DT here, and perhaps even joining in from the other side of the fence!
Happy scrapping!
Sue X

We are all sad to see Sue leave she is an amazing Designer and wish her all the best in her future creavtive journey. Thank you Sue for all the inspiration you have provided us and the members xxx 

Tuesday, November 10, 2015

Autumn Banner

Joan here today sharing an "Autumn Banner" tutorial.

1) cut paper into banner shapes

2) apply several colors of distress ink to a craft sheet

 3) lightly mist the craft sheet with water
4) swipe the banner pieces (right side down) through the inks to create swatches of colored areas


5) repeat the process until you reach desired look

6) let dry completely or dry with a heat gun

7) apply die cut letters
8) punch holes in banner pieces

9) string banner pieces and hang


Wednesday, June 10, 2015

Die Cuts Fun

Hi, Carol here today. This month I'm focusing on die cuts. I'm sure we all are hoarders of many different dies. I am and I can tell you 60% of the dies I bought, I have not used them before. So today I want to take out these dies and use them to make something useful.

I love reading books and I like to use planner. So I made some cute bookmarks and a holder for my clips. Some bookmarks you see here have dual function. They are bookmarks and also pockets for more tags and note cards.


For this onesie bookmark(from PTI onesie die set), I made a lace pocket for it from another die set (apron) and added some small cute ducks and bears die cuts. The ducks and bears can be used to embellish a simple card or my planner.  I cut 2 pieces of this onesie and only adhered scor tape on the top part. So it opens up to sandwich the page that I want to be bookmarked. 


For this PTI scissor keeper die, I stitched all sides together except for the top. So I created a pocket opening for note cards or smaller bookmarks or tags.


Here you can see how it looks after I take out the note cards from the scissor keeper die cut. The note cards are stamped and cut out with Unity stamp. I also created another jeans pocket bookmark cum pocket. The 2 mason jars die cuts are inserts I put into the jeans pocket. Love having dual functions bookmarks. Convenient when I read a book and wanted to take short notes. 


For this MFT cassette tape die cuts, I did them the same way as the onesie. The sentiments "Live Out Loud" are stamped with Maya Road Mix Tape stamp set. Love how cute they are. 


This is how it looks like as bookmarks for the onesie and cassette tape ones.


I also made a apple shaped card to store my paper clips in my planner. I noticed that these paperclips leave a mark on my planner. So it's best that I store them in this card. Can also clip small flower or other paper cutouts to use as embellishments. More storage use.

Hope you enjoy my sharing. And do join us for our June Mood Board challenge. Have fun.

Thanks for dropping by.