Showing posts with label challenge. Show all posts

Friday, October 6, 2017

July & August 2017 challenge winners

Hi Crafters

Our sincere apologies that we have been so slack in announcing previous challenge winners.

I can assure you, we have remedied this and will be announcing as normal early the next month.

So here are the July & August challenge winners.

Congratulations to ...

Melinda

IMG_1475

and Carolyn our Runner up.


Wonderful pages ladies.

***

Our August winner is

Lisa Marie

IMG_7941_edited-1

and runner up Georgina

Giorgia Rossini for SRM Stickers

***

Ladies, please contact


cchelepy@bigpond.net.au


to claim your prize.
*** Please note, prizes are provided by the sponsor so may take some time to arrive ***

---

Thank you to everyone who played along.

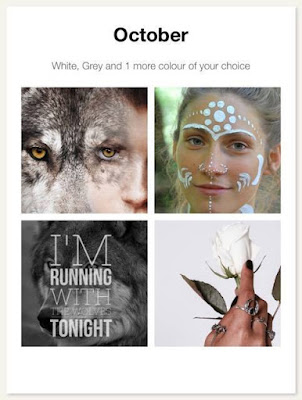
We hope you are enjoying the October moodboard.

October Challenge

Happy Crafting

Louise xo


Saturday, July 1, 2017

July Challenge moodboard reveal with DT

Hello Crafters

Welcome!
We hope you'll love our July challenge as much as we do ...


This month we'd like you to be inspired by this moodboard.
As an added challenge - your project should also feature feathers.


Our team has done a fabulous job to inspire you ...


As always we are grateful to our fabulous sponsors ...


Memory Maze Design

Australian owned ,Wholesale supplier of Laser cut chipboard, glass engraving,Stencils, 3D Stackums Card making designs, for Scrapbooking, Cardmaking and Papercrafts.

&


So much inspiration!
We can't wait to see your creations.

Happy scrapping!

Louise xo


Monday, May 1, 2017

*** May challenge reveal with inspiration from the Design Team ***

Hello Crafters

Welcome!
We hope you'll love our May challenge as much as we do ...


This month we'd like you to be inspired by this moodboard.
As an added challenge - your project should also feature feathers.


Our team has done a fabulous job to inspire you ...


As always we are grateful to our fabulous sponsors ...


So much inspiration!
We can't wait to see your creations.

Happy scrapping!

Louise xo


Wednesday, March 1, 2017

March 1st Challenge reveal with the Design Team


Hello Crafters

Welcome!
We hope you'll love our March challenge as much as we do ...


This month we'd like you to be inspired by this moodboard.
As an added challenge - your project should also include stitching.

Our team has done a fabulous job to inspire you ...


As always we are grateful to our fabulous sponsors ...


So much inspiration!
We can't wait to see your creations.

Happy scrapping!

Louise xo

Saturday, October 1, 2016

October 1st Challenge and DT Reveal

October  1st Challenge


Welcome to our challenge at Off the Rails.

It's October ... and fall is here soon. Colours will be changing the kids will be excited for Halloween. 

Our fabulous sponsor for the month is: 

Sponsor Memory Maze


"Halloween Theme"

This month we have Halloween mood board for you. So many fun things to create in the fall. We are here to challenge you and see just what you can do with any of these colours. You need some inspiration ???? have a look at what the DT have come up with. And just wait till you see what we have in store for you over the month.
         

Sarah


Jaehee


Be sure to play along with us, link and share with us so we can view and comment on your project.
Thanks for visiting today.. and see you again soon.

Monday, January 25, 2016

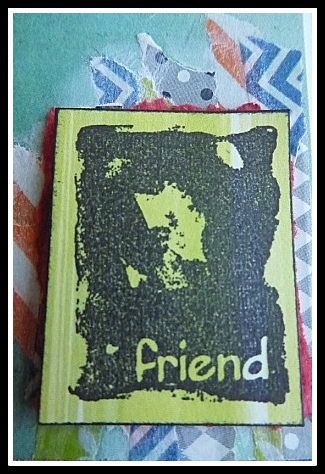
Friend

Today we have the talented Sandi on the blog sharing a tutorial on card making.

Making cards is an great opportunity to practice techniques and experiment with a range of product and at the end you have a special and unique card to give to your friends and family. Here is a quick card that I made within half an hour with a technique my amazing scrapbooking and camping buddy Fiona Paltridge showed me in a layout workshop early last year. I love taking any opportunity to attend workshops and events where I can learn and be inspired by fellow scrapbooking and card makers.

This is my take on the Off The Rails Scrapbooking January Challenge Mood Board and I would also like to take the opportunity to thank Narelle from Simply Stamping for sponsoring this month challenge. I didn't get a chance to order any any up to date Stampin' Up stamps but I did have some that I had purchased a while ago so jump over to Narelle's website and see the amazing new products she has available to purchase, I know I will be getting some soon.

www.offtherailsscrapbooking.blogspot.com.au
Off The Rail Scrapbooking January Mood Board

January Challenge Sponsor.


Items used include:
  • 1 piece White 'Card' stock
  • 1pc of scrap white card to stamp onto.
  • Stampin'Up 'Friend' stamp from 'Looks like Spring' set.
  • 'Enjoy the Little Things' 12"x 12" paper
  • Deep red card- small piece to be torn to back Friend stamp.
  • Ranger 'Glossy Accents'
  • A range of washi tapes in different colour and patterns
  • White gesso
  • IndigoBlu 'Ink splat' stamp set 
  • Black StazOn Ink
  • Black leather strapping
  • Coloured beads
  • Large Pattern Button.
  • Wet Ones 
  • Magic mount from Kazass, if you haven't go Magic Mount small pieces of cardboard from a box will do the same thing.


Step 1. Fold card stock in half and crease edge to make lay flat.

Step 2. Cut a piece from the 12"x12" paper to fit onto the front of the card leaving a small white border.


Step 3. Choose a colour washi tape and begin tearing strips of washi tape off the roll, continue to tear each piece into thinner strips and lay onto one of the long edges of the card in random places, overlapping the pieces, repeat this technique in a small area on the bottom right hand corner.  Repeat this with the other colours and patterned washi tape until you are happy with the effect.


Step 4. Placing small amounts of white gesso on your finger, smear the gesso over the tape and just over the tape edge in a gentle rubbing motion. Using a wet one wipe off excess and in areas that you want to see the patterns and colours more and to soften the edge of tape where it joins with the paper. Do each of the areas separately to ensure the gesso doesn't dry too much.


Step 5. As it dries you can  stamp the 'Friend' stamp onto the scrap white card stock with Black Staz On ink and cut it out.

Step 6. Tear a piece of red card to fit behind the stamp, place a magic mount behind cut out stamp and stick to red card.

Step 7. Thread the beads and button onto the strapping.

Step 8. Using Black Staz On ink and 'ink splat' stamp, stamp your splats where you think they would look the best to balance the look of your card.


Step 9. Glue on your bead/button strap with a strong glue like 'Glossy Accents'. I placed some magic mount under my button to hold it in the place and flat. And glue 'Friend' stack down onto the small tape area.


Step 10. Edge the card with Black Staz On Ink to finish the card.


Here are some closeups for you:


Hope you enjoyed this tutorial and pop over to the Off The Rails Scrapbooking page to check out more pieces that will inspire you to have a go at scrapbooking, card making and hopefully to enter our latest and future challenges.

Sunday, January 17, 2016

Learn With Luciana - Live Colorful Life

Hello OTR friends, Luciana here today!
Did you see how beautiful our first mood board of the year is?
In addition to vibrant colors, it still has a vintage touch! I loved!!
And today I want to show a test I did, hope you enjoy!
Let's start?

1 - Take some paper for your project and the desired picture.
I used a paper in blue tone with yellow polka dots with the colors displayed on the mood board.

2 - I started to tear by hand, with a distance of about four fingers of edge.

3 - I did it on both sides of the paper.

4 - I turned the papers and glued with double-sided tape.
This feature of tearing and reassembling is often used when
we want to make the two prints the paper in the same project.

5 - I had a souvenir of Cancun with sand and shells, so I decided to use this project.

6 - And here comes my test because the sand is super thin,
and I mixed it with soft gel medium and created a paste to implement the project.

7 - I applied in two corners where I put the photo.
I took the wet paste and applied the shells that are very delicate and fragile.

8 - I protected the photo back and glued with silicone glue.

9 - I decorated with some flowers.

10 - I used the title of our mood board for my project.

11 - And finally, I distressed the design edges with ink pad
and chalked the ledge with fine black pen.

Project details!

Products: Exotic Gardenia Malaysia Prima Flowers #537876, Pinata Petals Acapulco Mix Prima Flowers #540074, Roya menagerie Maud Prima Flowers #583361, Soft Matte Gel Finnabair #961428, Alphabet Stickers Prima Marketing #555399, Papel Oficina do papel - Coleção Verão -Sandálias


I hope you like the idea and also participate in our challenge!
I see you soon! A wonderful 2016 for all!
Luciana W