Showing posts with label feathers. Show all posts

Friday, May 26, 2017

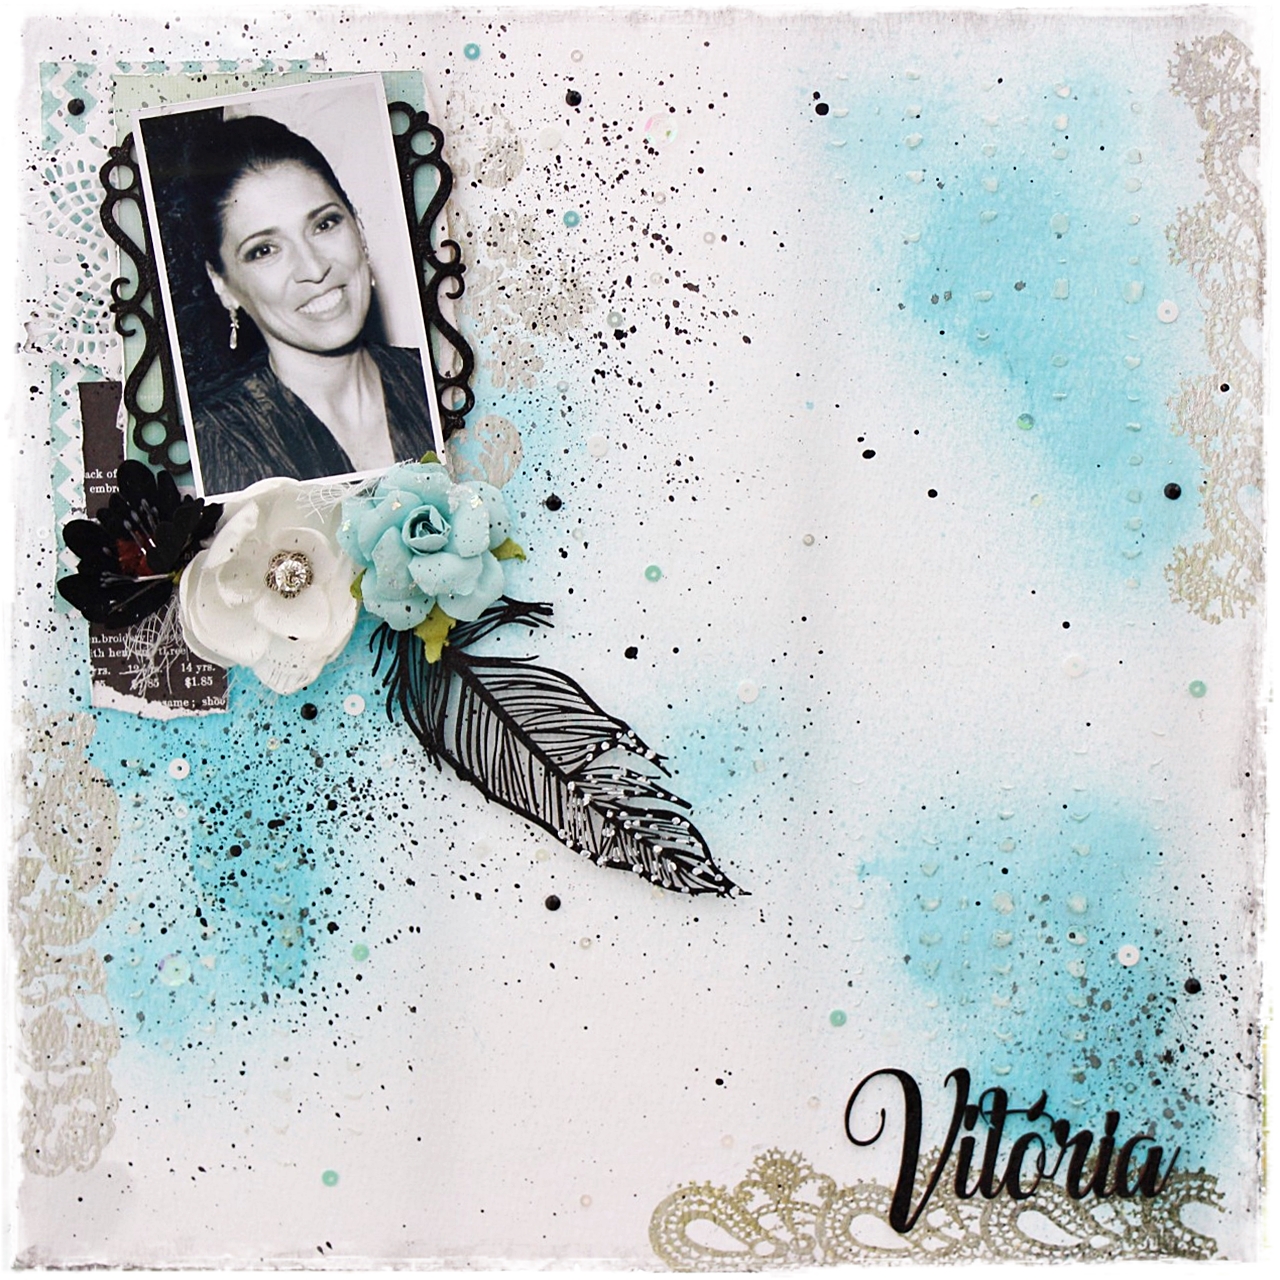
Art Journal Page with Luciana

Hi everybody, this is Luciana!

The month is ending, but there is still time for you to be inspired and participate in our monthly challenge!

Our mood board is clean, stylish and with beautiful colors!
I was inspired to create pages for my art journal!
I hope you enjoy! Let's start?

1 - Separate pages from your art journal or book 
(I do my art journal in an old book) and apply a few layers of gesso.
 2 - Apply chipboard pieces (doile and feathers) 
and pieces of chain between doile and feathers using 3D Matte Gel.
 3 - Apply a few more layers of gesso.
 4 - Apply a little glimmer mist or spray of your choice.
 I used the glimmer Aquamarine mist of Tattered Angels.
 
 5 - To make a shade apply a dark shade of glimmer or spray! 
I used Color Bloom Precious Stone and diluted with water spray.
 
 6 - Make splashes with the dark color.
 7 - Contour the edges of the page with the black Polsca pen and a fine brush,
 you can also use black acrylic paint or black plaster!
 
 8 - Write a sentence or journaling. I used two types of alphabets to write.
 
 9 - Apply embellishments like flowers, sequins and mélangé.
10 - Apply stick glue and foil on chipboard, feather and doile pieces.

 Detalhes das páginas.
  
 
Material used: art basics heavy gesso white #961442, art basics 3D matte gel #961398, 
color bloom precious stone #573812, glimmer mist aquamarine tatterd angels, 
play with green sequins by dress my craft, art ingredients mélange #963323, prima rub-on foils intergalactic #585624, lucerne doodle-daux prima flowers #555818, american crafts glitter letter stickers, engraver alphabet stickers #562939, metal chain, pieces of chipboard by momento divertido.

I hope you have enjoyed it!
Be sure to see other tutorials and inspirations in our blog!
Let's wait for your participation!
See you soon!
Thank you for visiting!
Luciana Warnowski
xoxo

Monday, May 15, 2017

Mid month reveal with the DT - May moodboard + feathers

Welcome to the mid month DT reveal.

The team have some really great projects and you've still got plenty of time to join this months moodboard + feathers challenge.


Here are three projects to get your creativity flowing...

Luciana


Joan


This month we thank our two wonderful sponsors:


Great inspo from the DT.

Hope you can play along.

Louise
xo

Tuesday, May 9, 2017

Scrapbook layout by Candy

Welcome everyone Candy here with another project for May.

Wow how the months are flying by, 
it will be Christmas before we know it.
The layout I have created using the Kaisercraft Ubud Dreams Collection.
I thought this would suit the mood board perfectly.


This is a photo of my daughter Tracy fishing.
This month we encourage you to use feathers on your project and I thought
the feathers would soften, making it a bit more feminine.


Here is the moodboard


Thank you for visiting
Candy Chelepy
2017 Dt member


Friday, May 5, 2017

Scrapbook layout + process video by Louise - Feather technique for the May moodboard challenge

Hi Scrap Friends

Louise with you today.
I'm sharing a layout + process video to show you a feather technique for this months moodboard.

"Today"


The challenge this month is to create from the inspiration board and include feathers on your page.


I decided to use this collage photo and include the colour turquoise from the moodboard.
In my process video you'll find a little technique to make these arrow feathers.
With thanks to Michelle Grant who provided this technique during a class.


Thanks for watching.

Can't wait to see you play along.


Monday, May 1, 2017

*** May challenge reveal with inspiration from the Design Team ***

Hello Crafters

Welcome!
We hope you'll love our May challenge as much as we do ...


This month we'd like you to be inspired by this moodboard.
As an added challenge - your project should also feature feathers.


Our team has done a fabulous job to inspire you ...


As always we are grateful to our fabulous sponsors ...


So much inspiration!
We can't wait to see your creations.

Happy scrapping!

Louise xo


Sunday, September 21, 2014

Your going to LOVE our Lizzy

Hullo fellow scrappers! Lizzy with you today with some more inspiration for our 
CURRENT CHALLENGE


 Isn't it delicious? I created this page, based on the feathers & that gorgeous color palette


I thought you might be interested in how I created some of my background ~ including MISTAKES...........so here we go!!!


STEP 1: Using a mask, CLEAR heat emboss some of the background 


 Step 2: Using your colour choice of ink [NOT archival - either Distress, or Stampin' Up - that sort!], rub over the masked area - I used a bit of cut up sponge: 


Step 3: Once you've worked in the colour to your satisfaction, use a wet wipe to remove the colour from where you have clear embossed: 

  
This reveals the background cardstock colour nicely!


  Strangely [for me] I felt compelled to write in my journaling at this stage....before anything else. Weird. Oh well......then I thought I'd add some stamped globe images. They turned out.....


 ...TOTALLY YUCK!!!!!!!!!!!!!!! Agggggghhhhhhh.......what to do? I didn't want to gesso all over my nice masked areas....sooooo.....I masked over the stamping with some Dimensional paint using a different mask!


  And actually liked it even better!!! PHEW:) Here's some closies of the finished page:


And this:


 Lovely gold embossed REAL feather alongside a chippy one!


You can see the texture here - I've used a spray mist as well:) 
Finally:

Soooo...have you joined in with our challenge yet? Hope this gets you scrapping!

Cheers ~ Lizzy ♥♥♥

Like I said your going to LOVE our Lizzy

Sunday, May 25, 2014

Mixed Media Inspiration with Catie

Hi Everybody!
Catie here, with some mixed media inspiration in the form of a canvas I recently created.
First up (after priming my canvas with gesso) I used some Design Memory Craft Faber Castell Whipped Spackle.  This stuff is AMAZING!  It's a kind of texture paste, but is a smoother, lighter consistency, that is a little more flexible when it's dry. I used it with this burlap stencil, and loved the effect it gave.

Next I used some bubble wrap to imprint the whipped spackle while it was still damp.

I dried it off, then used some watered down glimmermist to start adding some colour.

And of course, I couldn't go without gelatos!

Then I started adding more colour with Dylusions spray inks.  I think I lost the yellow from the gelatos in the end, because I got carried away with making peacock type colours with the inks, but that's the beauty of mixed media - there is no wrong!

Next, I stamped some peacock feathers, and coloured them with Dylusions inks.  I love the shimmer that these mists have in them.  I fussy cut the feathers to layer up on the canvas.  The other thing I love about the Dylusions inks is how far they 'go'.  I'd spray on the canvas, add some water, and blend, add a little more water, and suddenly it would pick up surrounding colour from stray droplets around the area, and create even more rich colour to play with!

To create more texture in the background, I've used tissue paper, punchinella, plasterer's tape, sequins, gauze, a fabric doily (which I coloured with glimmermist and Dylusions), some feathers I found in my stash, in peacock-type colours and some metallic thread.  I used Mod Podge to stick all this down - I think my hands were covered in more materials than the canvas at one point!!

So, you can see how I've continued to layer up colours and textures til I was happy with what I had in front of me.  I also used some Liquitex gel medium over the inks, which gave a glossy sheen and really brought out the colours, as you can see in the bottom right image of the collage below. 
  

The whole point to this canvas was to work around a stamped image of a postcard that I wanted to use as the centre piece. I built up my background around the postcard, and then looked up some creative-type quotes, as this canvas was to be a gift to a lovely scrappy-friend.  The quote I used is by Robert Henri "The object isn't to make art; it's to be in that wonderful state which makes art inevitable".
Here are a couple more close ups for you....
and the finished product!
 

I hope this has given you some inspiration.  If you have any questions, please do not hesitate to ask!

Thanks for looking :)

Catie xo