Showing posts with label patterned papers. Show all posts

Monday, November 5, 2018

"Loving Life" Scrapbook layout + process video by Louise

Hi Crafters

Louise on the blog today.
Here to share my inspiration for the November moodboard.

 "Loving Life"


This month we'd like to inspire you with this "Boho" themed moodboard.


Straight up ... this was really hard for me!
I'm definitely not a fan of the boho trend and I'm more a brights/bold kind of person.

So I did a little googling of "boho" and discovered arrows, florals and feathers.
Next I looked for a photo and decided this would be a good opportunity to scrap a picture of myself.

Finally I've gotten into my stash and put together this page.
You can see it here in this video ...


Thanks for watching and can't wait to see your creations.

Happy Scrapping.


Wednesday, September 5, 2018

"School Lunches Blah" Scrapbook layout + process video by Louise

Hi Crafters

Here to share my inspiration page for the September moodboard.

"School Lunches Blah"


I'm not going to lie. I found this food challenge quite difficult.


Firstly I chose my photo. While looking through my printed photos, I found this one of the first ever school lunches I made back in January.
It was kind of exciting at the time, but now I look forward to tuckshop days when I don't have to make lunches ... and I've still got to do this for twelve more years!!!!!

So I decided to make that the story of my layout.
The colour inspiration came from the little cupcake embellishment - I wouldn't normally have used it but for this page, it was perfect.

You can see and hear all about my process in this video.


Thanks for visiting.

Happy Scrapping.


Louise xo

Wednesday, July 4, 2018

"Making Memories" Scrapbook layout + process video by Louise

Hi Crafters


I'd like to share my layout with you - inspired by this month's challenge "Bring the Coldness"

"Making Memories"


This month we'd like you to embrace the cold and let it inspire your creation.


My first inspiration was to find a photo to scrap that really reflected the weather - this one of Master C with his hoody on, in black and white was perfect.


I then created a mixed media background on resist patterned paper to create similar colours to the moodboard.

Finally I've added some very neutral embellishments to keep in theme with the moodboard.

You can see the whole process in the video below.


Thanks for stopping by - happy Scrapping.

Louise xo


Sunday, November 19, 2017

Mixed Media Scrapbook Layout with Dawid

Hello everyone,

Winter is coming in my part of the world and the days are shorter and darker.
I decided to look back through my memories to find a holiday and blue sky.

I prepared a blue mixmedia page. I used a water inks in two shades of blue, white gesso, chipboards and few pieces of papers.


You can see how I made this page :)


Hugs,

Dawid


Wednesday, November 1, 2017

November moodboard challenge reveal with DT

Hello Crafters

Welcome to the November challenge.

Here is this months moodboard.


Our team has done a fabulous job to inspire you ...


As always we are grateful to our fabulous sponsors ...

We are lucky to have 3 on board this month


Memory Maze

Memory Maze Design

Australian owned ,Wholesale supplier of Laser cut chipboard, glass engraving,Stencils, 3D Stackums Card making designs, for Scrapbooking, Cardmaking and Papercrafts.


Narelle Fasulo


Bev Code


So much inspiration!
We can't wait to see your creations.

Happy scrapping!

Louise xo

x

Saturday, September 23, 2017

Using fishing line on scrapbook page with Trish

Hi Crafters

Trish with you today to share a little tip with fishing line.

I find that as much as l love thread..it sometimes doesn't quite give me the look l am after....but fishing line does.
I always use sticky dots for this job, they work brilliantly.

I have started with a bit of inking..some plasterers tape...this stuff is awesome..
And the all important fishing line and sticky dots.


Some sticky dots are really good for rolling into thin rolls.
Some are great for snipping into smaller pieces.
I have adhered the line on top of the plasterers tape..remembering to ensure there is  enough line to be visible under the embellishments. 


I've added some gold metallic thread, the button and other bits and pieces.
Including my fussy cut flower photo.


For this LO l have used some chippy, a hand made flower..not by me.., a calico tag, a bit of stencil work and using the same colour on the ampersand.

Thank you for popping in.
Enjoy the rest of the creations by the very talented team.

Cheers Trish.


Wednesday, September 13, 2017

Paper flower tutorial with Julie

Hi everyone.

Today I am going to share how I make one of my favourite flowers.

I saw a tutorial for this on YouTube some years ago and I just loved it and I must say I still use it to this day. I can't remember who posted the video but I am so glad I stumbled across it.

You will need the following supplies:-

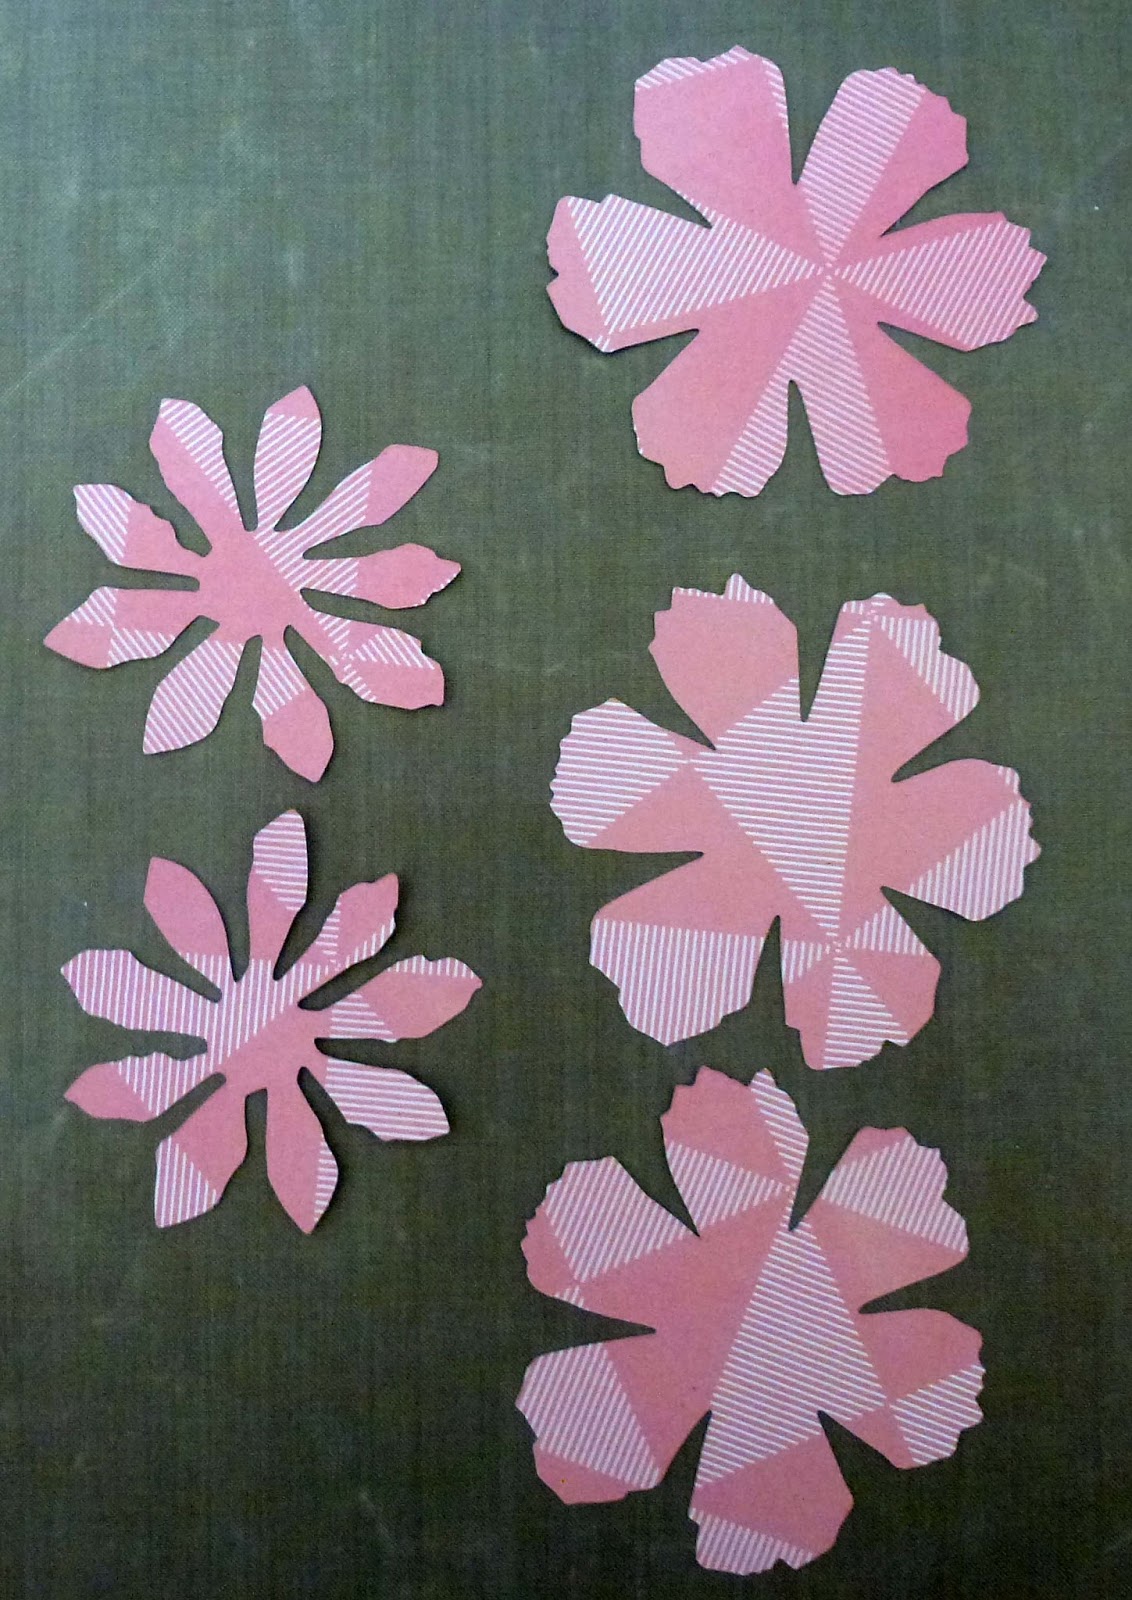
The die is Tim Holtz Tattered Florals. If you do not have this die try it with different dies that cut a 6 petal flower and a spiky flower.

Also instead of the glue I quite often use my hot glue gun because it is instant.

The flower takes about half a sheet of paper.


You will need to cut 3 of the large broad petaled flower and 2 of the spiky petaled flower.


With your scissors cut between the petals of the large flowers towards the centre without cutting the petals off.


Ink all of the edges of all of the petals including where you have cut into the flower. This step can be deleted if you don't like the inked look


With a small round tool, I used my hole poker but you could use a bamboo skewer or toothpick, roll the edges of all the petals on the larger flowers


Fold the petals of the spikes flowers in half so you have the right side showing


Using the same tool that you used to fold the large petals over, wrap the petals of the spiky flower around the tool. Wind in alternate directions as you move around the flower until all petals are curled


This is what you should have now. We are ready to assemble the flower.


I have used my hot glue gun. Attach one of the large flowers on top of another being sure to stagger the petals


Repeat for the third flower.


Push down in the centre of the flower as you a sticking the layers together so you get a nice depth to your flower


Attach the spiky flowers to the centre of your flower, one on top of the other.


You can then add some gems to the middle of the flower if you wish. They are not very noticeable and sometimes I do not add them.


For the flower below I used a different paper for the centre.


And for this flower I have used double sided paper and a different paper for one of the large petal layers.


I am sure there are many different combinations you could try with your papers and this flower.
Give it a go. I'd love to see what you create.

Till next time
Hugs
Julie


Monday, September 11, 2017

Quick and Easy Joy Fold card with Tania

Hi there!

Tania joining you today to share a tutorial for making a Joy fold card........

I have always loved making cards, but find making folded cards even more fun and rewarding than a normal card. 

There are so many different types of Folded Cards around, so I am going to share one of my favourites with you and this one is so quick and easy :)

Joy Fold Card

You will need:

A Scoreboard
Adhesive, either tape or glue
Cardstock
Patterned Paper
Ink
Stamps
Trimmer

Step 1
Cut your piece of cardstock 8 ½” x 4 ¼” and then score at 5 ½”.


Step 2
Cut another piece of cardstock 8” x 3”, score this at 4”.


Step 3
Cut your patterned paper 4” x 5 ¼” and adhere to the inside of your card.


Step 4
Cut another piece of patterned paper 2 ¾” x 4” and adhere to the front of your card.


Step 5
Cut another two different patterned papers 2 ¾ “ x 3 ¾”, ones that can be stamped on would work best, this way you can stamp a greeting on the top one, it is optional to stamp on the other one. Adhere them as desired to the inside and outside of your 8” x 3” piece of cardstock.


Step 6
Add some adhesive to the back of your smaller flap and then adhere to the inside of your card, slightly to the right. Make sure that your fold is to the right.


Step 7 (Optional)
If you wish to secure your flap into place, add either a stamped image or a circle with 3D dots, slightly over the edge in the bottom left corner to keep it closed.


Step 8
Decorate your card as desired to finish.


Well that's all from me, I hope this has inspired you a little to play around and have fun making some different styled cards! 


Until next time

Tania xx