Showing posts with label Fiona. Show all posts

Friday, May 15, 2015

May's Mid Month Reveal


Do you see something in our Mood Board that has created a spark of creativity?


If you don't know what a mood palette is let me explain them to you. We have colours and we have pictures, all you need to do is use use something from them to inspire you. If this means only use 1 thing then that's ok , also if you want to use all of the mood board then that is ok to. Shall we see how the Design Team was inspire?


As always the creations from our Design Team are gorgeous to look at and so diverse. If you would like to see what the other half of what our Design Team created click Here.


Don't forget to visit 2Crafty Chipboard who are our sponsor this month. They are offering the lucky winner a selection of their  gorgeous chipboard. Who doesn't love chipboard?


Please Note our sponsors this month, 2Crafty, will post Australia-wide only.  International entrants, please note that if you enter, we have to assume that in the event you are chosen as a winner this month, you are prepared to pay the postage for your prize.

Friday, April 3, 2015

Art Journal Tutorial

Hello lovely OTR friends Fiona here with you today to share a journal page I created using the more feminine mood palette for April. (The one with the pink in it) But before I do, I would like to mention that, once again, this month the wonderful Pam Kuhn is sponsoring our challenge. You could win yourself a $25.00 voucher (International winners stamps only).


So here is the second mood palette. It is very similar to the first in colours except for the added pink! So for those who love to dabble in complementary colour schemes .... this one is for you!


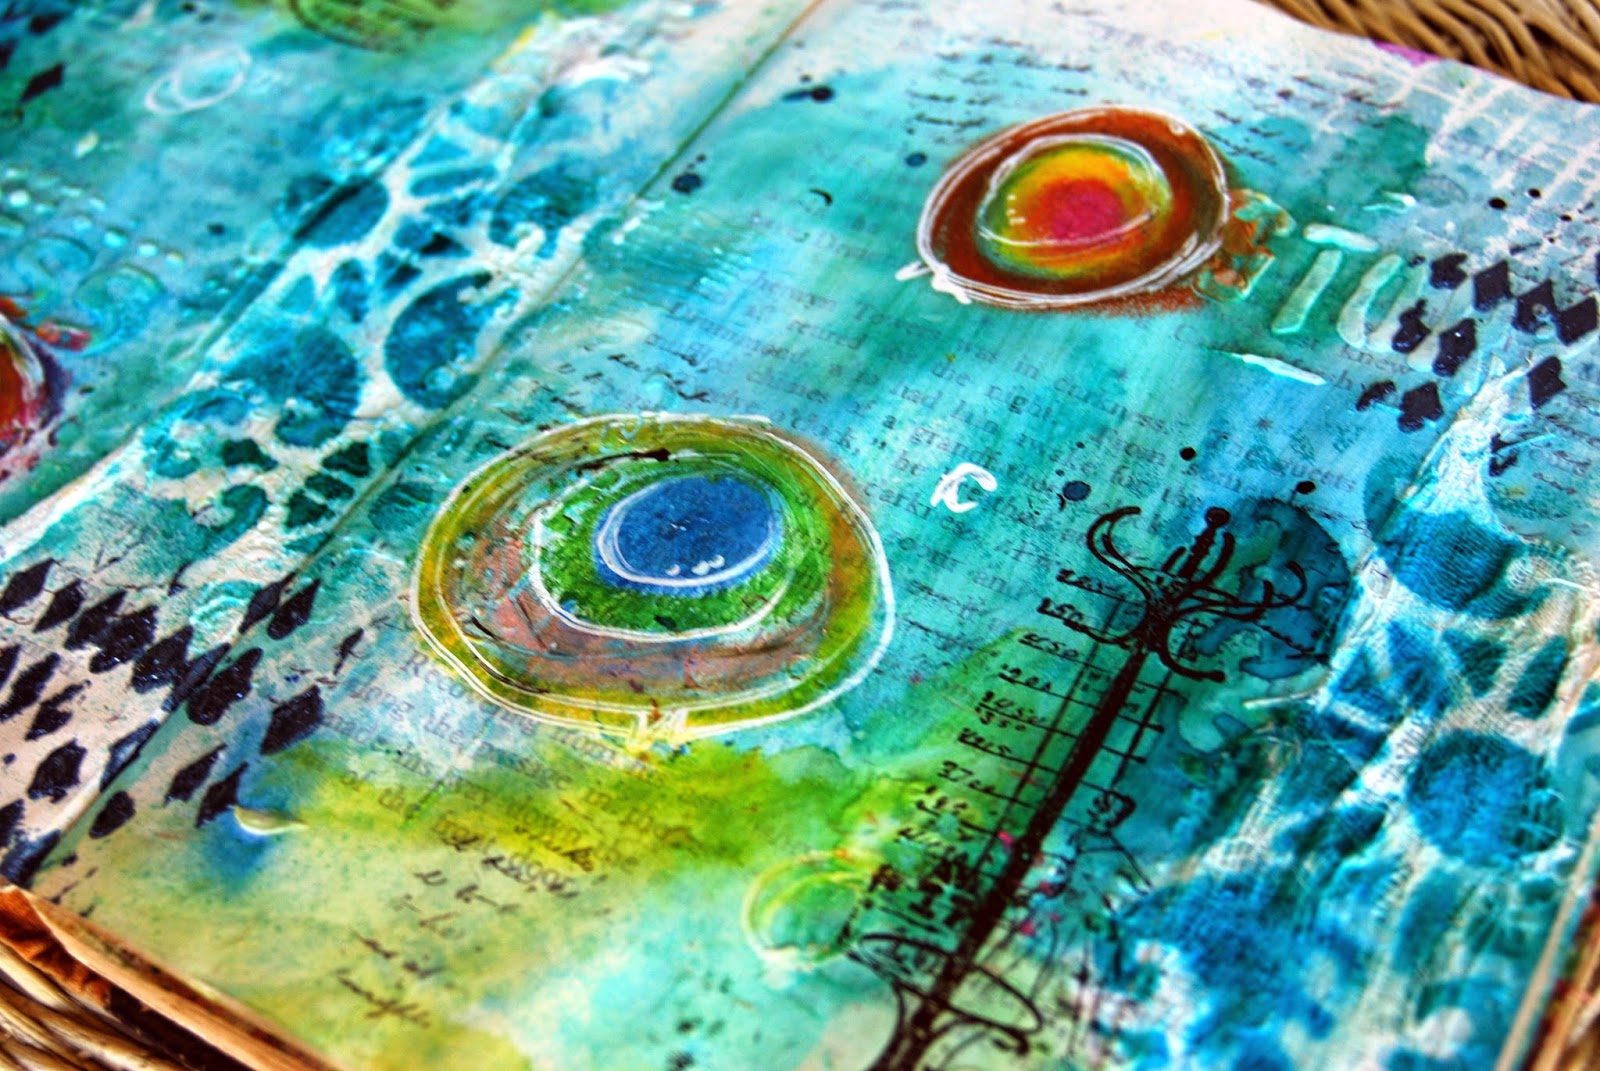
I decided to try out these colours in my art journal and this is what I created.


I have several journals I play in but this one is my favourite. It is an old book that I picked up in a trash and treasure store while away one weekend with some scrappy peeps having a mini retreat time.


I didn't prep the pages at all I simply applied some modelling paste directly on to them and then carved some circles into it.


Next I sprayed some Heidi Swapp Colour Shine in the green directly onto the modelling paste while it was still wet. I love the shine these sprays have.


To make the paint circles, I mixed some gloss gel medium with some acrylic paint in a small needle nose bottle. The gloss medium helps to give it some body and a beautiful glossy shine after it has dried.


I left it over night to dry. When I came back the next morning, it had dried a lot darker than I had anticipated, so I decided to add some more pink by mixing matt gel medium with glitter.


It makes the best glue for applying glitter and beads and such and it dries clear!


Next I decided it needed some black paint flicks. Recently I've been using chalk paint for my flicks. It's nice and thick and just the right consistency for flicking!


I added some stamping using some of my favourite stamps. These ones are designed by Daniel Torrente and you can purchase them from Stampotique. I've just recently purchased some more. YAY!


Finally I created a hand drawn border using the Kaszazz 5502 fineliner set on page 227 of their catalogue. These pens are my favourite go to pen for journalling!


You can see how easy and unstressful this was to create.


That's what I love best about journalling. Make some time to have a play and remember your challenge piece can be a journal spread too. We accept all kinds of art in our challenges.


Thank you for checking out my tutorial. See you on the flip side.

Cheers
Fiona xx


Tuesday, February 3, 2015

Ahhh Paris .......

Hello OTR friends Fiona here with you today to share my Ahhhh Paris Art Journal creation. Now, promise you'll be gentle as I am still very new at this art journalling thing! But I'm slowly getting the hang of it. From what I can gather, It's all about the layering and so, I've taken a step by step process of the layers I used to create this piece.


I used our current February Mood Palette for inspiration (love the colours)


Alwyas begin with a generous coating of gesso either white or clear. This will strengthen your page and give it "tooth" for the paints and other mediums to grip to. Next I added some die cuts and another layer of gesso over them.


Yes I know ...... I've covered up the pretty flowers but keeping scrolling down and you'll see I've wiped some off with a wet wipe!


See this is the thing that you have to trust when art journalling ..... sometimes things are not going to be "seen" as such but without them the piece seems wrong ...... so even thought these pretty flower die cuts are almost completely covered up, it adds to the final over all look.


Time to add some colour. I used 13@rts Ayeeda paint. I find them highly pigmented and the matte series of paints dry with the perfect finish. I chose Matte Pink and Matte Green for this project.


O.K. now the first layer of stamping. I use Stazon Ink because, well, it stays on! I've used a beautiful stamp from Kaszazz our sponsor this month. It's from the "River Bank" uncut set.


Then the next layer is some colour rub ons. I think these are from Kaisercraft. Make sure your background is super dry or the rubons won't stick.


Next layer ..... some more gesso. Now I've applied this using a dry brush technique which is exactly that, use a dry brush. no water but it can take some practice until you get it just right so an alternative is wack on the gesso and then, again with a wet wipe, remove some. Either way you'll get a very similar result. A softness over the whole page.


Last layer ..... more stamping. Here I've used a big Tim Holtz stamp (one of my all time favourites) and just stamped right over the top of everything. The stamp does say "Paris" on the bottom, so I did deliberately stamp that in the middle of the page. Other than that the rest of the stamping is random.


My last trick was to use a black marker to emphasise the word "Paris". I simply traced over the top of the stamp making it darker than the rest of the stamping on the page. I used a Kaszazz fine liner (5502) to do this. They have a set of 6 ranging from 0.05 to 1.00. I would highly recommend them to anyone wanting a set of markers for journalling. They are brilliant!


You can enter our challenge by adding your creation to the Link on the right hand side of our blog page. Directly link your projects page and add your name. Remember to include a link to our challenge page, a picture of our mood palette in your blog post to be eligible to win.

Good luck xx


Sunday, February 1, 2015

February Challenge

Is it February already?? Are you sure?? But wasn't it just Christmas?? LOL Who feels like this?? I know I do. So yes unfortunately it is February already but the good news is that we have a new challenge for you, which means a new mood board and a new sponsor.

Well not a new sponsor as such because Pam Kuhn from Kaszazz has sponsored us in the past and we are happy to say she is our sponsor again for February.


She will be giving the February winner a $25.00 voucher with free postage to anywhere in Australia You can spend up with Kaszazz. Check out their catalogue HERE. They have some amazing stuff including a fabulous selection of rubber cling stamps, their own paper designs and the whole Tim Holtz Ranger Distress Inks Range and more! International winners, stamps only.

And here is our beautiful February mood palette. Our Design Team member Fiona has created this soft yet modern palette for you to be inspired by.


And for even more inspiration our Design Team have been busy creating their own interpretations.


You have to agree, that's a pretty amazing collection the design team has put together.

Entries open from today and end on the last day of February. Remember to include your name when you link up. Good luck xx


Wednesday, November 26, 2014

Speed Jouranlling!!!

Hi Off the Rails peeps. Fiona here with you again. This time I've got something a little different to share with you.

Last weekend, I went away with some of my scrappy friends for a little mini retreat at Port Fairy. We had an absolutely amazing time but I have to say the best part of all was ....... the speed journalling.

Now I'm not even really sure how it came about. We were being silly (as you do) decorating a t-shirt for or #scrapfitretreat (long story) and while doing this, we came up with the idea of progressive journalling. Previously that day we'd been for a wander in the beautiful little town and stumbled accross some old books in some of the second hand stores. We purchased them with the intention of "trying something new". We were going to turn them into art journals.

This is one of the books I purchased for $5.00. It's a beauty!! Almost too good to paint in. I'll keep some of the pages journalled free so the book itself can still be a feature.


So we decided on some rules to follow (cough cough) loosely LOL! The first rule was that you only had 3 minutes to add a layer of whatever you choose to each journal and then you had to pass it on. You should have seen the anxiety that created!!!!

We gave ourselves drying time between each layer, or it would have just all turned to mud. There were six of us in total and we had to decide whether out journal would do one round or two. Depending on how much detail and depth you wanted. This created a great amount of discussion believe it or not. The true minimalists amongst us (namely ME!) really struggled with the concept of LOTS of layers!! But I braved it out and managed one "double rounder".


Apparently my response at the end was precious as I managed to say "Well It's very....... busy". But regardless of my apprehension at the time, I really love this one now.


So we basically started each one as a clean slate. We used gesso to prep the pages and then either did the first layer ourselves and handed it on or handed it on as a blank canvas. After 3 minutes ........ we passed it on and the next one was passed to us.

It was HIGH PRESSURE!!! Oh my Gosh did I freak out ....... I went into panic mode every time Leonie said "GO!". Do I use a stencil? what about stamping? What colour should I use? I could just spray or should I add some paper?????? The options were endless and needed to fit with what everyone else had contributed.


I ended up with three beautiful double spread art journal pages. I have to admit it got easier and easier to add my own little flair to each journal and the results were AMAZING!!!


It was the most fun I've had creating in ages!!! I would recommend it to anyone having a scrappy get together! This last spread is definitely my favourite. I got all the contributors to sign their name on the page so I would always be able to look back on it and remember how much fun we had.


I love the fact that I have this amazing page in my art journal that I didn't contribute a single this to except the coating of gesso at the beginning! it's like having a gift in my book :


Give it a go. You'll love it!

cheers Fiona xx