Showing posts with label Sanna. Show all posts

Monday, May 25, 2015

Step-by-step on Sanna´s May Moodboard layout

Hi there, everyone, Sanna here today to share with you a fun and simple step-by-step on my May Moodboard layout. Here is what I did:


I first took a piece 12x12 inch piece of acetate foil and stamped half image of a butterfly with blue StazOn stamp onto it and then fussy cut it.


Next I applied some PVA glue splatters onto the woodgrain paper and also onto the butterfly image. I let the glue dry. When it´s dry it turns transparent.

I then took a sheet of transfer foil that works with PVA glue and rubbed the foil piece onto the glue area with my finger. This way the golden foil layer transfers to the recently applied glue area. Make sure you work fast when you see the glue turn transparent, don´t wait too long since when the glue is completely dry the foil might not stick to it anymore. On the other hand if you go over the area when the glue has not dried properly, the foil will not stick to it yet. Therefore make a small test on a piece of extra paper to get a feel for how the glue works.

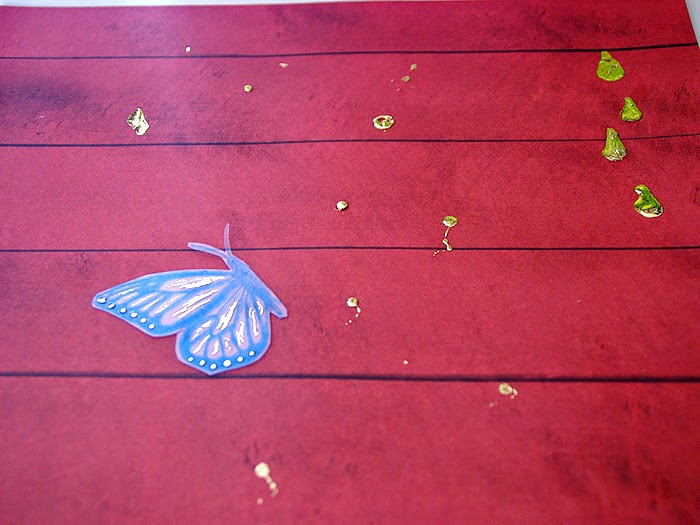
Here you can see how the result looks like both on paper and on the acetate piece. Lovely gold foil effect!!

Next I applied some Dina Wakley turquoise acrylic paint with a sponge onto the background. I just dabbed it onto the paper and created small coulds here and there.

After the acrylic paint layer was all dry I went and added some stamped sentiments/quotes here and there for additional detail. I used a Technique Tuesday Studio AE stamp set called "Saying Hello" here.

Next I added some Glimmer Glaze splatters here and there to go with the black stamping.
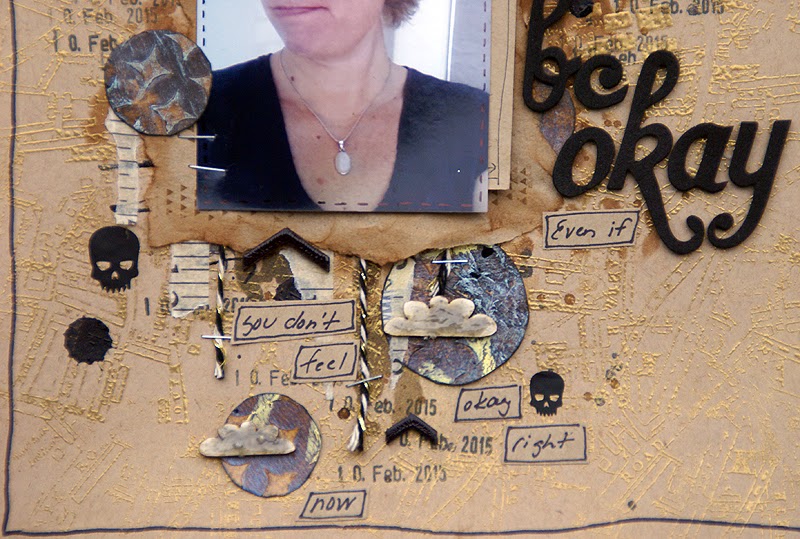
After that I cut some black and blue paper strips to go to both sides of the page for additional interest. I also added a few pieces of patterned paper underneath the photo and doodled around the edges of those papers. All my journaling (as it is again very personal and I prefer not to share it with the whole world) is hidden behind/in between those papers. There is enough space on both sides under the blue paper piece to add plenty of journaling :). I have also added a few puffy stickers from Evalicious here and there for interest. Besides, I love those little puffy stickers to pieces - got to use them where I can :).

Finally I also added some embossing enamel to go with my golden water drops. This one is a shabby white with gold pieces in it. See how the faucet also has a golden shimmer to it? That is because I also applied some PVA glue over it and added some gold foil here and there. That´s it, my layout is done. Here is the finished result and some detail photos:


I am glad I got the chance to take a class by Emma Trout a few years back and she featured this PVA glue & foil technique to us there. So all the credit on that idea goes to her. Needless to say that now that gold foil is very trendy, I am happy to possess this glue and quite a few sheets of the foil in my stash. I hope you give this fun technique a try! Enjoy!!!

xxx, Sanna

Friday, May 15, 2015

May's Mid Month Reveal


Do you see something in our Mood Board that has created a spark of creativity?


If you don't know what a mood palette is let me explain them to you. We have colours and we have pictures, all you need to do is use use something from them to inspire you. If this means only use 1 thing then that's ok , also if you want to use all of the mood board then that is ok to. Shall we see how the Design Team was inspire?


As always the creations from our Design Team are gorgeous to look at and so diverse. If you would like to see what the other half of what our Design Team created click Here.


Don't forget to visit 2Crafty Chipboard who are our sponsor this month. They are offering the lucky winner a selection of their  gorgeous chipboard. Who doesn't love chipboard?


Please Note our sponsors this month, 2Crafty, will post Australia-wide only.  International entrants, please note that if you enter, we have to assume that in the event you are chosen as a winner this month, you are prepared to pay the postage for your prize.

Wednesday, March 18, 2015

Be Okay

Hello there! Today I´d like to share with you the layout I created based on the lovely March color palette. I´ve also gathered some step-by-step photos for you. Hope you enjoy!


First I took the "Tattered Lace" stencil (by The Crafter´s Workshop) and applied some "Vintage Photo" and "Gathered Twigs" Distress Ink thru it onto the kraft cardstock. I pretty much followed the sketch regarding the placement of the stenciled areas.


Next I stamped with a Hero Arts background stamp onto the background using VersaMark ink. After that I applied some golden embossing powder over the stamped areas and heat embossed them. The embossing powder is by Lindy´s Stamp Gang (King Midas Gold).


On this picture you can see the nice golden embossing powder on the background. After that I applied some May Mists "Licorice" here and there.


Before I stamped the background I took some random residue circle pieces I had kept from a previous project, inked their edges with a black ink and then applied them onto the background after the embossing part was done.


 I then went along and added some twine, washi tape and a piece of brown wrapping paper onto the background. After that I stamped with a roller stamp using the "Gathered Twigs" Distress ink. I also inked the edges with an ink blending tool.


I then went along and added all kinds of little bits and embellishments, some additional stamping and wrote the journaling and added the title. I also added some plain chipboard clouds and covered them with a "Soft Pewter" Glimmer Glaze tone.


Here are some close-ups from the layout. I´ve hand written the journaling on to small kraft cardstock pieces and outlined them with a black pen.


 It has been a while since I last made such a monochromatic layout, but I must say I really, really enjoyed creating this one. A very personal page with a hidden journaling.


What a gorgeous color palette this months mood board has!! And the sketch is just fabulous. I sure hope many of you will find the time to play along!! Enjoy!!!

xxx, Sanna

Sunday, March 15, 2015

Mid Month Inspiration

The March challenge has two components this month, a mood palette and a sketch. Are you fingers getting itchy just thinking about what you can create? If so why not look below for inspiration from the design team and then get creating. We would love to see what you create.  


Thursday, January 15, 2015

January Mid Month Reveal

Can you believe that it is coming to the mid point of the month already. This means that we have more amazing inspiration from our very talented Design Team. 

My take on this moodboard is slightly different to my usual style, but I absolutely loved creating this layout with these colours!! This is one of my favorite colour palettes of all time :)! I´ve gone totally flowery and romantic with glitter and all with this one. Had a great time creating this one - hope you will too :)!!


Don't forget to follow us on Facebook.