Hello Scrappy Friends
It's Wendy back again. I know I said last months tutorial was my last, but I couldn't stay away and decided to share with you a card I made. This really is my final project for Off The Rails so I hope you like it.
I call it the "quick" baby wipe technique because there's no stamping or fussy cutting involved. This is the card I created using the "quick" technique and it took me less than 20 minutes.
All you need to make a similar card is cardstock for the base, cardstock/paper scraps, your favourite die, embossing folder (optional), and a few different colour inks.
Step 1
Lay your baby wipes, several layers thick, on a suitable working surface. I used a plate because it was easy to clean up and it protected the surface underneath.
Step 2
Dab (do not spray) your ink colours on to the baby wipes. I wouldn't use more than three different colours because it tends to get too murky. Wait a little while until the colours blend together. I did this twice with contrasting colours.
For this I've used Tsukneko ink in Tangerine, and Kaiser Mists in Antique Gold and Yellow.
For the second one I used Tsukneko ink in Peony Purple, Cerulean Blue, and Tuscan Beige.
Step 3
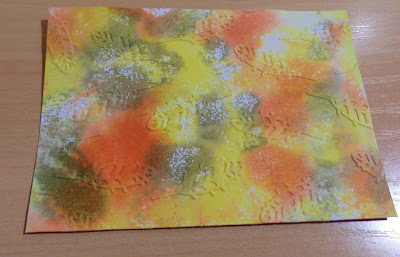
Normally at this point you would press your stamp on to the baby wipes, using them like a stamp pad, then stamp the image on to your cardstock for fussy cutting later. I'm not really a confident stamper so I use the inked baby wipes to pattern my plain cardstock. This is as simple as pressing your cardstock down on the baby wipes. This is what mine turned out like.
Step 4 (optional)
After your newly patterned cardstock is dry, emboss a pattern on one of the pieces of cardstock. I used We R Memory Keepers feather embossing folder.
Step 5
Ink the edges and attach to the base of your card.
Step 6
This is where you save more time by not having any stamped images to fussy cut. Use the second piece of inked cardstock to die cut your favourite image. To keep in theme, I used a Kaisercraft feather die - much faster than fussy cutting!
Step 7
If you want more dimension and contrast, ink the edges of a contrasting piece of paper or cardstock and glue it to your card.
Step 8
Glue the first die cut in place.
Step 9
Finish off your card by attaching the second die cut with dimensional tape and adding your sentiment. I also added some butchers twine to my feathers. You could add anything you want at this stage.
I hope you enjoyed my hints, and thanks for dropping by.
Happy scrapping.


This really is very cool and so versatile. Thanks for sharing!
ReplyDeleteThanks Louise :)
DeleteThis really is very cool and so versatile. Thanks for sharing!
ReplyDeleteSuper cute! Love the colors you used.
ReplyDeleteThanks so much Jennifer :)
DeleteSuper cute! Love the colors you used.
ReplyDeleteLove this! So clever!
ReplyDeleteThanks Joan :)
DeleteSo nice!!! Great colors!
ReplyDeleteThank you Luciana :)
Delete