
Digital Mixed Media Layout
Hello Scrapbooking friends,
It's Wendy here today to show you how to create a digital mixed media layout. It's all a matter of building up the layers, just like you would with a traditional layout.
Earlier in the month I did a layout based on the first inspirational mood board. Because both mood boards are so delicious, I decided to base my tutorial on the second one. Just to refresh your memory, this is the second mood board:

This mood board is so soft and pretty and this is what it inspired me to do:

All of the elements on this page were created by me using different methods, (e.g. stamping, spraying, stencilling), just like you would if you were creating a traditional layout.
Some time ago, I did a tutorial on how to create digital embellishments and it is these techniques that I've used to create the elements on this page. I've loaded that tutorial on to my blog and here is the link Creating Digital Embellishments. Now here are the steps involved in creating this layout:
Step 1: Background

I chose this ready made paper because it has a soft look, like the mood board. You can make your own paper, once you know how to layer your artwork/elements. For simplicity, I used a readily available paper for my background.
Step 2: Add some water colour

I added these soft water colour splatters by splattering water colours on a page (traditional style), scanning the page, loading it into my digital software (you can do this in whatever software you use), and cutting away the background as explained in the digital embellishment tutorial.
Step 2: Add some stencilling

I've used a script stencil and a coffee stain stencil and I've added them exactly the same way I added the water colour in Step 1.
Step 3: Add the photo to make sure it's balanced
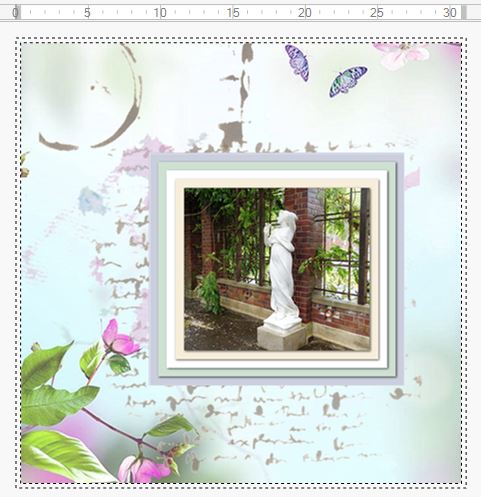
At this stage you can move everything around to make sure it fits. I've added several mats to my photo, in the mood board colour palette, so that it matches the background and helps the photo to pop.
Step 4: Adding a title

When I was fairly happy with the placement of my photo, I added a title. I didn't design this title myself, I used the alphas I already had in my digital artwork stash. I could have just as easily used one of my favourite fonts.
Step 5: The final embellishments

As you can see, I've added flowers as my final embellishments. This step was really special for me because I used photographs of some of the flowers I received for Mother's Day. After taking pics of my flowers I loaded them into my digital software and cut away the background just like in Step 1 and 2, and as described in the digital embellishment tutorial.
It took a fairly long time to do this layout but the process was so satisfying. And, the end result makes me happy because the photo was taken at the Wintergardens in NZ, a place I loved visiting. Also, I have incorporated my Mother's Day flowers and I still have them in my personal artwork file to use over and over again.
If you want to ask me any questions please feel free.
Thank you for dropping by.
Amazing digi work!
ReplyDeleteThank you xx
DeleteBeautiful tutorial!! Thanks for sharing!!!
ReplyDeleteThank you :)
DeleteWow, Wendy. I've not spent a lot of time with Digital Scrapping but I really like what you've done. Going to investigate this a little more. Thanks for sharing.
ReplyDeleteAwesome step by step!
ReplyDelete