Hi everyone, Narelle here. It's my turn on the blog today. So I wanted to share with you how I made the fence on my card that was on here other day.
As a reminder, here is the card.
As a reminder, here is the card.
And this is a close up of the fence on the card.
It really is easy to make. Here's how.
All you need is a brown piece of card stock, a darker brown ink pad, a woodgrain stamp or even a woodgrain embossing folder would work too if you inked it up. Then you need a traingle punch or scissors and a cotton bud or something similar.
Step One - stamp your card stock with your inked up woodgrain stamp. Your piece of card stock can be bigger than the size of the fence you want as you can trim it down later.

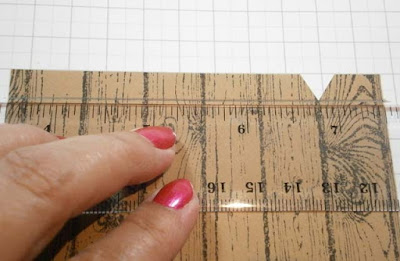
Step Two - Once the ink dries, use your triangle punch and line up the point of the triangle with the line between the palings and punch. If your stamp doesn't have the lines like mine does, just punch evenly along the egde to make the palings. I like to punch the first one, then draw a line across so that I get them all punched evenly. If you don't have a triangle punch or any punch with a v shape in it, then you can use scissors to make the same v shape in the fence.
Step Three - Rub out the pencil line. Trim off any half panels from the ends to tidy it up. Use a cotton tip and your ink pad to ink around the edges of the fence and down each individual paling. I find a cotton tip is easier to use than a sponge dauber as you get a finer line between each paling. You can also use the cotton tip to highlight features in the wood as well.
This is what your fence should look like when done.
Enjoy making one and including it in a project soon.
Thanks for popping by.
Have a great day.
Cheers,
Narelle


Narelle, is a beuatiful tutorial!!! Thanks for sharing!!!! xo
ReplyDeleteThanks for sharing such clever idea!
ReplyDelete