Showing posts with label Tania Ballestrin. Show all posts

Tuesday, October 11, 2016

Distress Glaze, Resist Technique with Tania B

Hello everyone, I'm sharing a Resist Technique with you this month, using Distress Inks and the Tim Holtz, Distress Micro Glaze. I've had a jar of this in my stash for awhile and haven't really used it alot. So I decided to get educated and watch a few videos and see what this little jar of goodness can do!!!


Basically it's a water resistant sealer, for Distress inks, stains, markers, paints, watercolours & even ink jet prints. It's a waxy medium, kind of like vaseline or lip balm, and the best way to use it, is to rub it on with your finger.
So I created a tag, and used the Micro Glaze for my background.


It pays to use quality card stock or even watercolour paper for your tag!
 I used a Kaisercraft flower stencil, and some Distress Ink in Wild Honey. (It's best to choose a stencil that has a large pattern, so that you can get your finger in with the glaze.)


Using a blending tool, add colour through your stencil, changing the depth of the colour from light to dark in some areas. (It helps to use some washi tape to tape your stencil and tag onto your craft sheet to stop it from slipping.) 


Once your colour is on, remove the stencil and clean it, before placing it back over the pattern. This time, place it slightly off to the side, so you can see some white areas next to the flower petals.


With your finger, rub some of the Micro glaze into each area through the stencil, (a little bit goes a long way, and you can go lighter in some areas, same as for the Distress Ink.) You can't really see it, so just make sure you have given a good coverage, and then remove the stencil.


The next step is one of my favourite techniques for colouring backgrounds.
Dab some ink from several Distress Ink pads, onto your craft sheet. I have used these colours below!


Spray all the colours with a good mist from a mister bottle, and then Drag your tag through all the colours. (Try not to swirl it back and forward as you may end up with the colours being muddy.)


Dab the excess colour off the tag with a paper towel and use a baby wipe to wipe over the resist areas. You should see that the Micro Glaze has resisted the colours.


You can even stamp over the top once the colour is dry and then, once again, you should be able to wipe off the ink from the resist areas. (Providing you use either a water based ink, or Archival will work as long as you wipe it off quickly!)


To decorate the rest of my tag, I used a blending tool and some Black Soot Distress ink around the edges of the tag! Then I added some washi tape, twine, flowers & a stamped tree branch. And as I'm into birds at the moment, I stamped and watercoloured some bird images from a Kaszazz stamp, and fussy cut them.


Here's my finished tag!


I hope you have enjoyed my tutorial! And maybe it will inspire you to have a play with resist techniques!


Thursday, August 11, 2016

Little Canvas Mini Album with Tania

Well Hi!!! Thanks for taking a peak at my first Tutorial at Off the Rails, I'm thrilled to be here!
Today, I have a cute, little canvas mini album to show you!
I purchased this Francheville mini, canvas album at Spotlight, quite some time ago.


I had made one previously in a class taught by the lovely Sharon Laakkonen from Prima, that was in Cairns some years ago! (And I always loved the feel of it, and the prettiness of course.) 
To colour the pages, I used a few different mediums, Distress Stains, Heidi Swapp Colorshine, and Distress re-inkers mixed with water.


You can dry with a heat gun or pop them out in the sun for 30 minutes! 
The purpose of this mini album, was to house some pics of my daughter's 7th Birthday. I had scrapped them previously, but due to moving around and things being in storage, they got a little tattered, so needed a new lease of life! So, I wanted some fun and funky colours.
The next step before decorating is to punch holes in the album pages. I did this with my punch and set tool, but a Crop-a-Dile will also do the job. (I measured about an inch in from each edge, and then used the first page as a template to do the rest.)


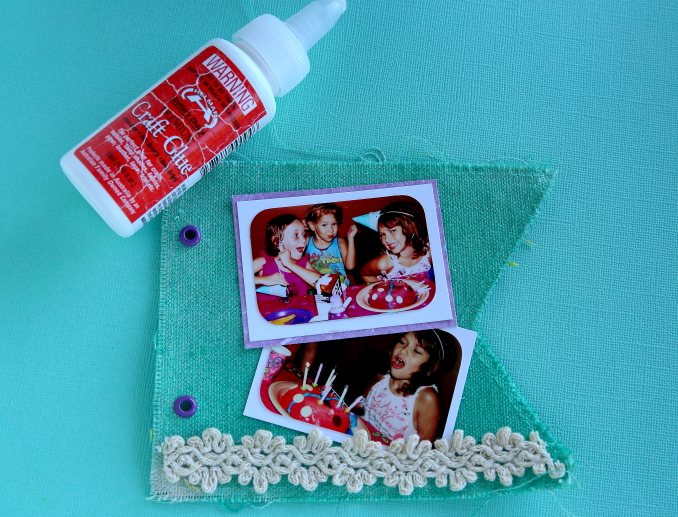
I did some stash busting and found some colourful eyelets that have been waiting for the perfect project!
Because I haven't used a kit to embellish, I needed to have some consistency throughout my pages, so I sewed this gorgeous lace onto the bottom of each page. You could use a machine, but I chose to hand-stitch mine. 


Now for my pages!


My preferred adhesive for this project was the Helmar craft glue. I am normally a tape girl, but for fabric this is my absolute go to glue. It also helped the project come together rather quickly!


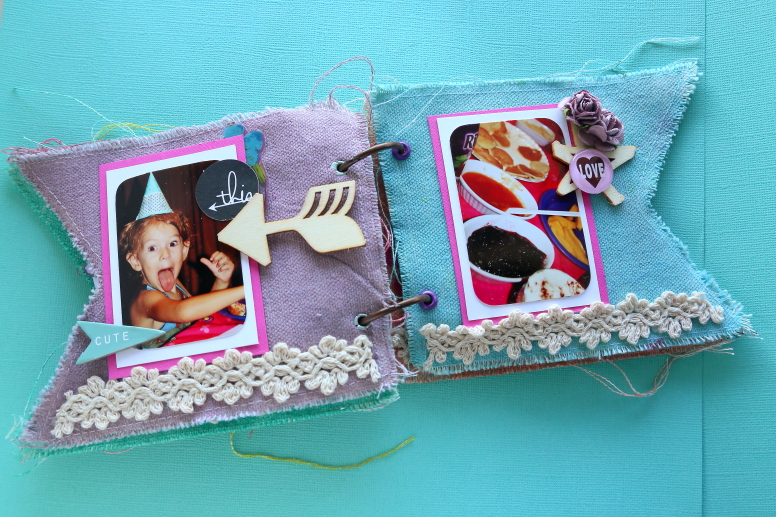
To embellish the pages, I really used up alot of bits and pieces! Prima and Kaszazz flowers, Heidi Swapp ephemera, wood veneer and stickers!!! There's a Greatest View Flair on there too. 


I had a spare canvas flower, from Prima which I re-coloured and popped some Ranger Ice Stickles in the middle to mimick the other sparkly Prima flowers in the album.


I included a few more flairs from D-Lish Scraps in the pages, and used up a few random embellies and flowers.


A few of the flowers were re-coloured to match the colours in the opposite pages. 


This aqua flower, was sprayed with Dylusions first and then when dry I used my finger and just wiped a bit of Gesso on the tops of the petals, to tone down the brightness.


And here is the finished product, joined together with some hinged rings! I just love all the texture! The good thing is, I get to gift it to my daughter all over again, she loves it!

Thanks so much for joining me, and be sure to stay tuned to us at Off the Rails, for loads more Design Team inspiration!!