
Today we have the talented Sandi on the blog sharing a tutorial on card making.
Making cards is an great opportunity to practice techniques and experiment with a range of product and at the end you have a special and unique card to give to your friends and family. Here is a quick card that I made within half an hour with a technique my amazing scrapbooking and camping buddy Fiona Paltridge showed me in a layout workshop early last year. I love taking any opportunity to attend workshops and events where I can learn and be inspired by fellow scrapbooking and card makers.
This is my take on the Off The Rails Scrapbooking January Challenge Mood Board and I would also like to take the opportunity to thank Narelle from Simply Stamping for sponsoring this month challenge. I didn't get a chance to order any any up to date Stampin' Up stamps but I did have some that I had purchased a while ago so jump over to Narelle's website and see the amazing new products she has available to purchase, I know I will be getting some soon.
 |
| Off The Rail Scrapbooking January Mood Board |
 | |||||||||||||||||
| January Challenge Sponsor. |

Items used include:
- 1 piece White 'Card' stock
- 1pc of scrap white card to stamp onto.
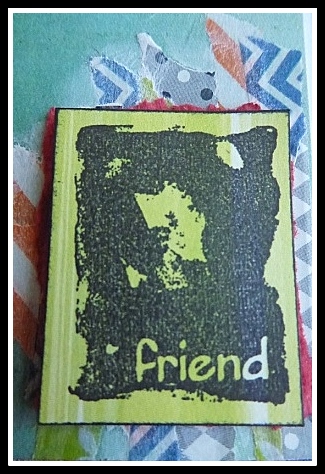
- Stampin'Up 'Friend' stamp from 'Looks like Spring' set.
- 'Enjoy the Little Things' 12"x 12" paper
- Deep red card- small piece to be torn to back Friend stamp.
- Ranger 'Glossy Accents'
- A range of washi tapes in different colour and patterns
- White gesso
- IndigoBlu 'Ink splat' stamp set
- Black StazOn Ink
- Black leather strapping
- Coloured beads
- Large Pattern Button.
- Wet Ones
- Magic mount from Kazass, if you haven't go Magic Mount small pieces of cardboard from a box will do the same thing.
Step 1. Fold card stock in half and crease edge to make lay flat.
Step 2. Cut a piece from the 12"x12" paper to fit onto the front of the card leaving a small white border.

Step 3. Choose a colour washi tape and begin tearing strips of washi tape off the roll, continue to tear each piece into thinner strips and lay onto one of the long edges of the card in random places, overlapping the pieces, repeat this technique in a small area on the bottom right hand corner. Repeat this with the other colours and patterned washi tape until you are happy with the effect.

Step 4. Placing small amounts of white gesso on your finger, smear the gesso over the tape and just over the tape edge in a gentle rubbing motion. Using a wet one wipe off excess and in areas that you want to see the patterns and colours more and to soften the edge of tape where it joins with the paper. Do each of the areas separately to ensure the gesso doesn't dry too much.

Step 5. As it dries you can stamp the 'Friend' stamp onto the scrap white card stock with Black Staz On ink and cut it out.
Step 6. Tear a piece of red card to fit behind the stamp, place a magic mount behind cut out stamp and stick to red card.
Step 7. Thread the beads and button onto the strapping.
Step 8. Using Black Staz On ink and 'ink splat' stamp, stamp your splats where you think they would look the best to balance the look of your card.

Step 9. Glue on your bead/button strap with a strong glue like 'Glossy Accents'. I placed some magic mount under my button to hold it in the place and flat. And glue 'Friend' stack down onto the small tape area.
Step 10. Edge the card with Black Staz On Ink to finish the card.
Here are some closeups for you:

Hope you enjoyed this tutorial and pop over to the Off The Rails Scrapbooking page to check out more pieces that will inspire you to have a go at scrapbooking, card making and hopefully to enter our latest and future challenges.
Amazing!! Thanks for sharing!!! xo
ReplyDeleteLove the idea of the Gesso over the washi tape!
ReplyDeletegreat idea.. thanks for sharing
ReplyDelete