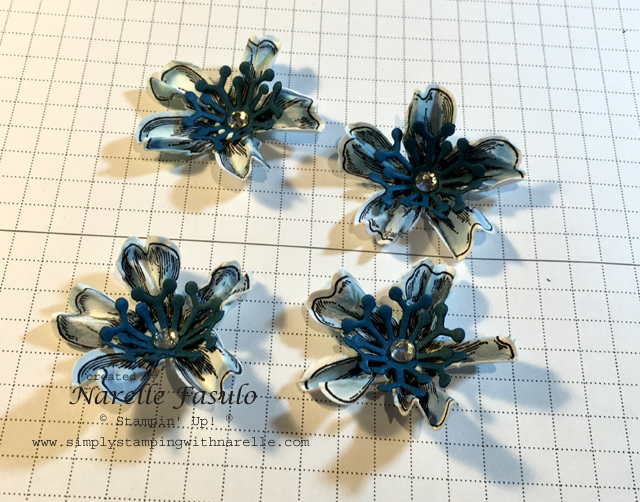
A little while ago on my blog I shared some monochromatic cards highlighting the new Stampin' Up! InColors. On those cards were some dimensional flowers. And since this months challenge at Off The Rails Scrapbooking is all about monochromatic, I thought I would share with you how I made those flowers.
Here is one of those cards.
Here is a close up of the flowers.
And this is how I made them.
First I stamped the flowers using the Flower Shop stamp set and punched them out using the Pansy Punch. I then water coloured them using an Aqua Pen and Dapper Denim ink. Some flowers I coloured fully, some I just did the edges.
Then I spritzed them with water and did like a concertina fold on each petal.
After I spritzed the flowers I realised that I forgot to cut them. To enable a nicer petal fold, I cut between each petal down to the stamped stamens. This just makes each petal that you are folding as long as the stamped edge of the petal. I hope this bit makes sense. Once you get to this step when making them, you will understand what I mean....I hope...lol
They were then dried with the heat tool.
Once dry I pulled out the petals a little so they weren't quite so scrunched. Then I cut out the centres using the Botanical Builders Framelits. I pushed down in the centre of both the flowers and the flower centres using the Stampin' Pierce Mat and Paper Piercing Tool. This gave the flowers more depth.
The centres were then glued into each flower using Tombow Liquid Glue. The last thing I did was add a rhinestone to the middle of each flower. And there you have it, completed flowers.
I hope you find this tutorial useful and you make them yourself real soon.
Thanks for dropping by.
Have a great day.
Cheers,
Narelle


Wow, what a stunning card Narelle, love those flowers!
ReplyDeleteLovely!!! Thanks for sharing my friend!!! xo
ReplyDelete