
So naturally I'm hooked to the planner craze as I have always been a "list" kind of girl. I've got all sorts of lists: travel to bring list, to do list, shopping list, DT project planning list etc, done daily. And for the past few years, I've made my own planners from scrapbook papers.
Today I'm going to share some simple and not new ideas (I think) on DIY inserts, stickers, notes etc. Being a scrapbooker, we have all sorts of stamps, dies and embellishments and paper scraps!! So its time to dig these out and make your own planner stickers, lists etc instead of spending big bucks on them. (ahem... of course, you can still buy some... I listed a few items in my shopping list already). And here's what I have made for this year and next year's planner use:
1) DIY lists/notes:
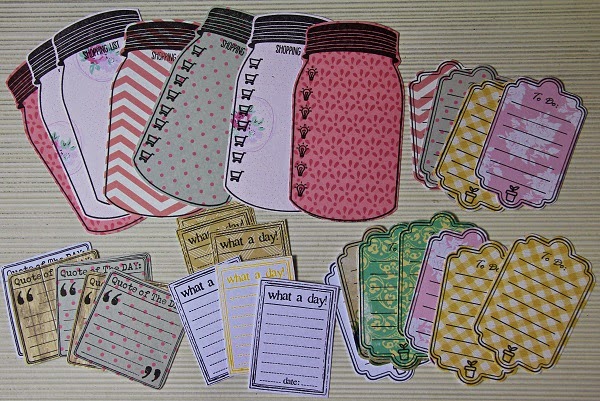
I love the Unity mason jar stamp. for the words, shopping list and the shopping trolley and light bulb stamps, I used Studio L2E planner stamps. Love them!!!

You can also color in the stamped icons, as you can see in the "washi" and the bows and hearts. After I stamped all these, I can either use double sided tapes or roll it through the Xyron sticker machine to make into stickers or just use them as note cards. I stored all these in the front or back pockets of my planner.

This is one way I used them: shopping lists for Christmas.
2) DIY Stickers on labels:

I bought these office labels from a bookshop and just stamped the icons. Its good for adding fun to my daily planner. And its quick and easy to use when on the go. I can use them to itemize my lists too. Fun!
3) DIY pocket and inserts:

This pocket die is from MFT. I used the pocket diecut on the last page of my 2014 planner. Its actually adhered to another pocket. This holds the MFT mason jar diecuts which I used as notecards too.

I love mason jars and I can't help but add them in to my planner. It can serve as shopping lists or as a quick and simple card or bookmark.
4) DIY dual usage sequin pockets:

Sequin pockets is the "in" thing now too. But I wanted something useful other than for decorating purpose. So I diecut a journal card pocket with Papertreyink die and cut out the window with shaped dies.

I used small packaging plastic bags to hold the sequins. The reason being I can always open up and use the sequins inside to deco my planner as and when my mood strikes or even to make a quick card on the go. You can adhere the journal card pocket anywhere you like in the planner. And now it serves 2 purposes: to decorate as a sequin pocket and also able to open up and use the sequins. Pretty and functional.
5) My planner accessories pouch:

Here's the front cover and some pictures of my 2014 planner.


And now it's time to do my 2015 planner. Friends always find it puzzling why I diy my own from scratch. Well, it's fun and unique, my very own DIY planner.
I hope you enjoy my sharing today. Have fun crafting.
Thanks for dropping by and please join us for this month's challenge here.
The pockets look like a lot of fun and very festive. Have fun with your planner.
ReplyDeleteSo lovely!!!
ReplyDelete